Page 9
It's time to fill the kit with some fluid but, you do not want to turn on your entire PC just yet. Make sure you disconnected your ATX power plug and remaining 4-pin power plug from your mainboard. We simply are going to bypass the electronics circuit for everything except the water-cooling pump and control unit.
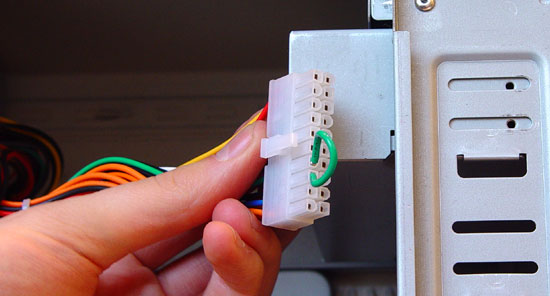
Now here's a trick I'm going to teach you, Guru style. Make sure that the only thing connected to the PSU is the water cooling pump. Thus take the ATX power connector that normally mounts to your mainboard (see above picture) and bridge pin 13 and 14 (Black/Green) with a wire.What happens is this, your PSU will now activate itself and your pump will start working.
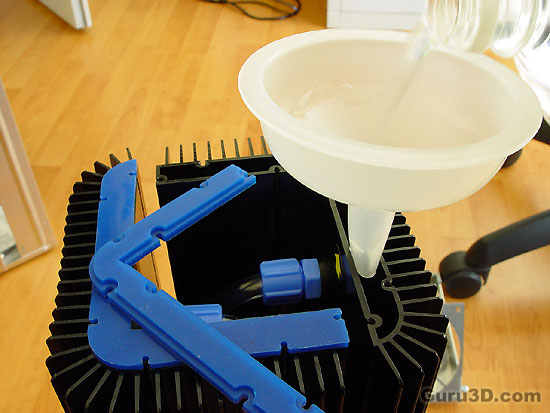
You will hear that the pump is now active as it makes noise when it has no water. We now place the funnel on the Aquabox and start filling it with the UV fluid. Shake the tubing, fill the reservoir with the UV reactive water. Do what you need to do to make sure there is no air in there and that the water is flowing. CAREFUL here as you WILL leak some fluid as the reservoir fills up it'll spill some water as it has not been secured yet. Once you are confident that enough water is in the we shut down the pump again. And now place the blue rubber 'plug' back and secure everything with the screws again. Only after that process will everything (should) be water leakage free. This is the most tricky and difficult part of the product actually. All the screws are a bit too much.
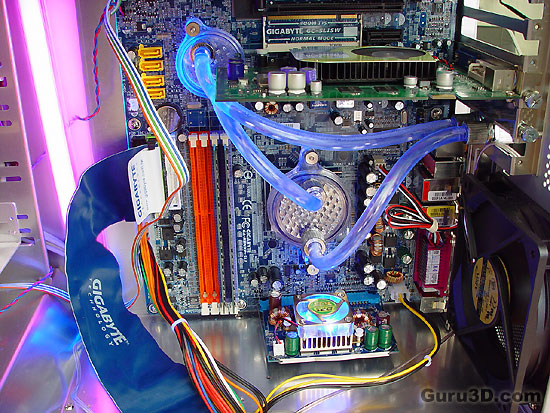
Once your are confident that nothing is leaking and working properly, it's time to reconnect the ATX cables to your mainboard and other gear and fire the beast up. Again make sure the water is flowing though the tubing and check that there is no air on the hose so that we know we have constant flow.
Congratulations, you now have a watercooled system, you can finally call your rig a beast! Although it's not yet a pretty sight, we are getting close to the end-results. This entire procedure will take you roughly an hour's time if you are slightly experienced with building PC's. If you are not, just take your time and use this article as guideline.
Afterwards take your time cleaning up the wiring with, for example, tie-wraps.
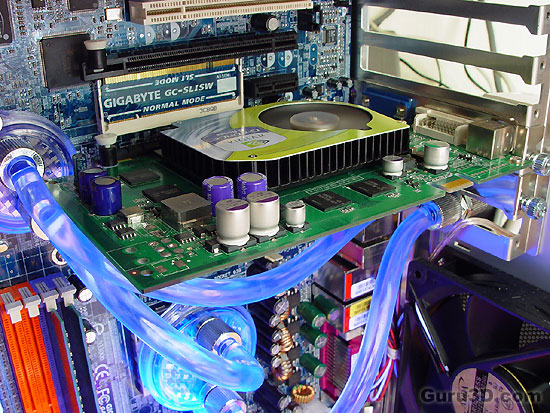
Problem! This is an nForce4 AMD mainboard and the chipset cooler is blocking graphics card. Not exactly AquaPark's fault, yet the mainboard manufacturer did not exactly take custom chipset cooling into account here. A GeForce 6600 GT will fit, but barely. Anything bigger is a no-go. You of course can opt to use that chipset cooler to cool down the graphics core of the graphics card and not the mainboard chipset.
This is something you need to think of before buying this solution. Hey look at that cool glow, once it gets dark it's truly amazing. Let's take some images in twilight :)
