Page 14 - Photos building the rig
As you can see I also inserted the water-cooling unit itself, just to see how stiff the quick couplings were and to observe it's final placement. Please already insert the DDR3 memory and make sure you lube that processor with thermal paste (smear it out a little, a drop is enough).
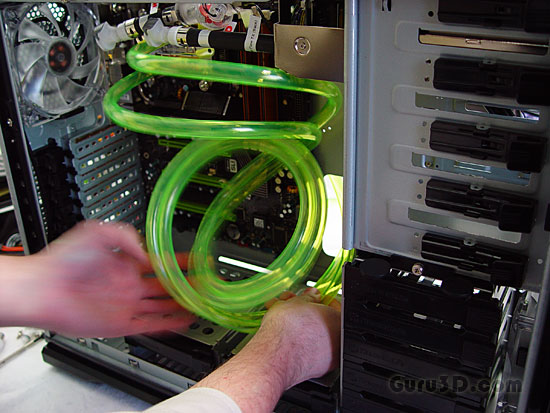
TV series 24 sounds - "tic-tac-tic-tak" Entering hour 20 before deadline here. Routing the tubing behind the mainboard tray. Must-go-faster ...
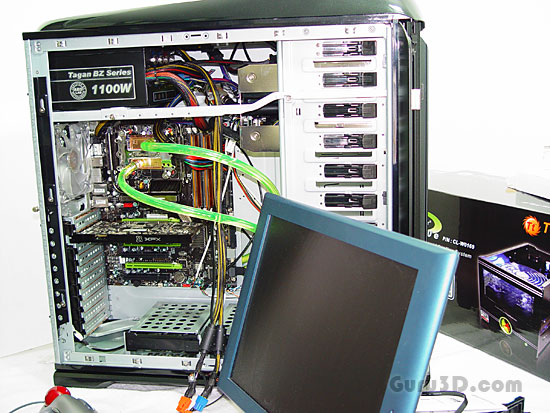
Okay in a nutshell, I've inserted mainboard, water-cooling, water-block, tubing and PSU here. Some of the wiring now has been done and routed in a way you can not see it.
It's time to bypass the mainboard and only connect the water-cooler and fill it first. Before we power up everything we need to be damn sure we have proper water-flow and a leakage free water circuit. And we did ...
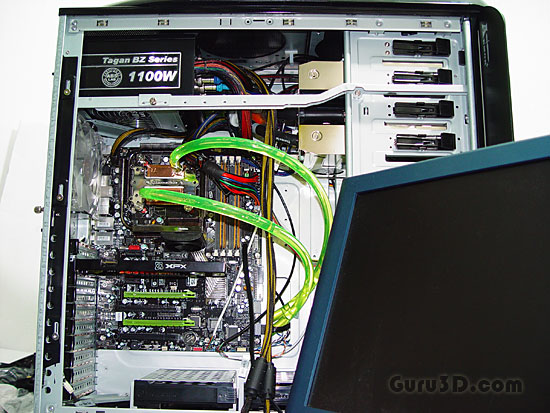
T-minus 19 hours to deadline ... okay waterflow is good, no air in tubing, now we can connect the mainboard to the PSU's power distribution and insert/attach some basic items to see if the mainboard is still alive after all this abuse.
Here's how that went, Click power ON ... PLUCK A DUCK [Ed - Sorry]... nothing ?
And after 10 seconds, Oh crap, I need to insert the power cable again haha *coughs*
Yay, it's working ... still need to connect some wiring properly though, but the system shows a POST after we cleared CMOS (did I mention I would really like a Micro-switch for clearing CMOS already, NVIDIA ??).
