Practical part - impressions
Practical part - impressions
The installation process is not complicated, at least the hardware part. You only need to plug in the micro USB cable (pity it’s not a Type-C connector) to the HM70 FLIP unit on one end and the PC on the other. Then you repeat the procedure with an HDMI cable, which means the monitor should be visible to Windows and operational. It’s not any different from connecting a monitor to your PC.
As soon as the system starts, the display folds up automatically. If the system is shut down, the display folds down automatically. The motor is quite noisy. Also, it is noticeable that the cables are pretty short and, therefore, more suitable for installation inside or near the housing. For example, if you want to use the Lamptron HM070 Flip on your desk, you need longer cables and possibly an external power supply. We think a slot cover to guide the wires into the case and a stand for external use would also be helpful here.
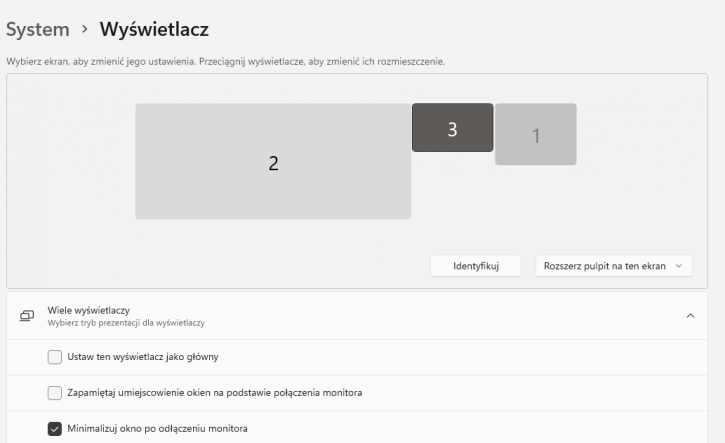
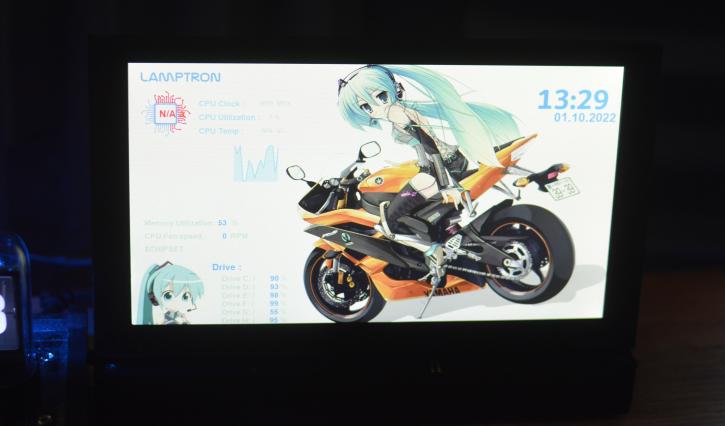
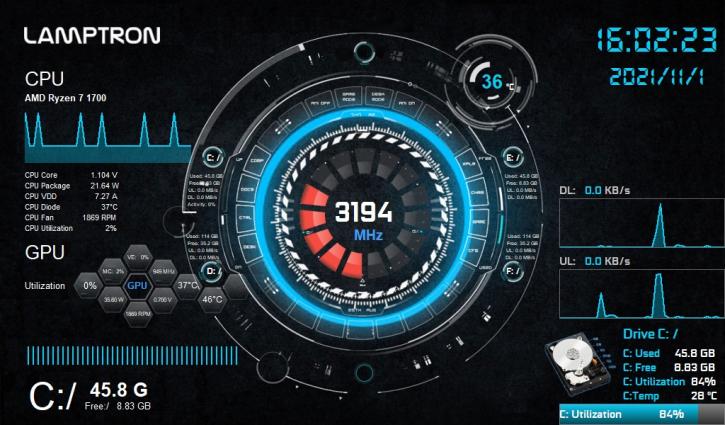
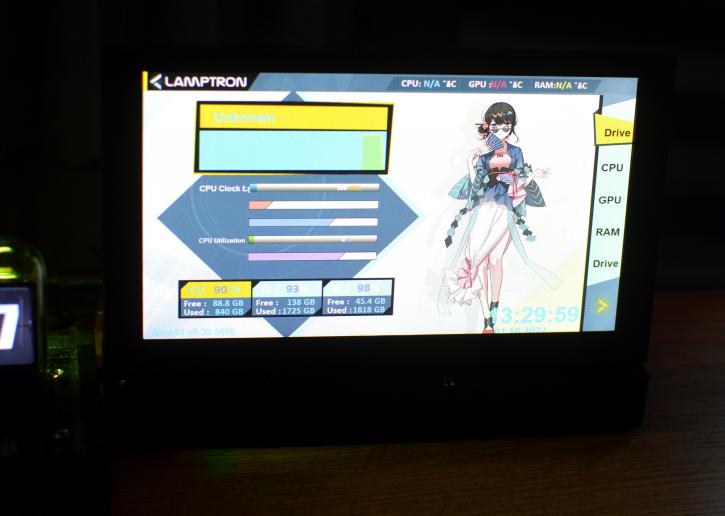
The resolution is 1024 x 600 (and you need to remember to pan the display settings to the display), but, as you can see, it’s been oriented vertically to fit nicely into the gap below your primary monitor. Then you need to install Aida64 software. There are two monitoring options: one is to use the browser (which you would need to keep permanently open), and the other is to have Aida64 running in the background. We’d suggest the second approach, as it’s more straightforward and shouldn’t cause any issues (which we encountered with the first option, likely due to some rogue network settings). Ok, let’s do it.
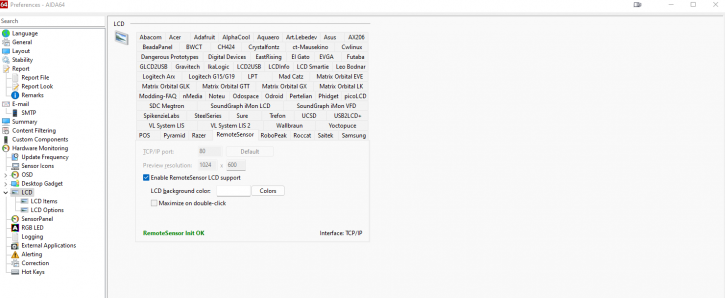
You need to go to HW Monitoring->LCD settings and enable the remote sensor by ticking the “Enable remote sensor LCD support” option.
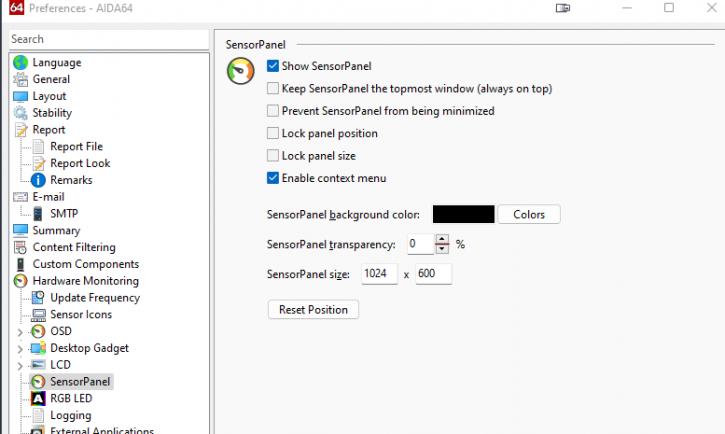
After that, tick “Show SensorPanel” and set the size. When you right-click the SensorPanel that has opened after the last step, you must select the SensorPanel Manager.
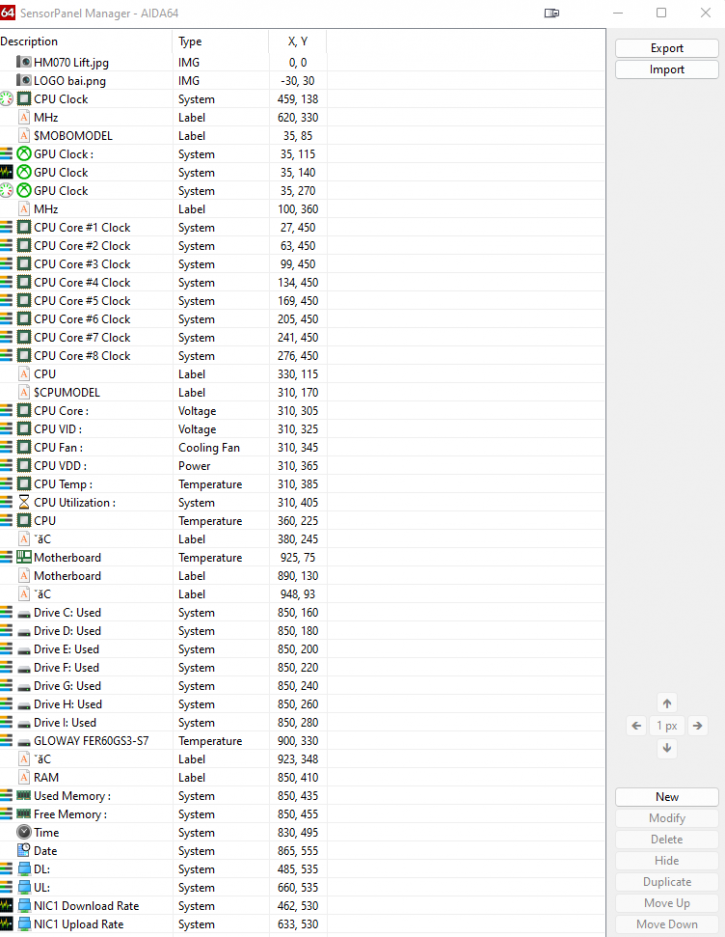
It’s a good starting point, as you don’t need to set everything up by yourself. You can import a layout (several are provided on the included Pendrive) or export a custom one if you have created it (or download it from the Aida64 forum).
Each element can be modified, moved by a certain amount of pixels, renamed, etc. The background image can also be changed. You might almost say that “the sky is the limit.” You’ve got a lot of options to choose from, which is excellent, and the overall stability of Aida64 is very good. I didn’t encounter any issues in that matter.
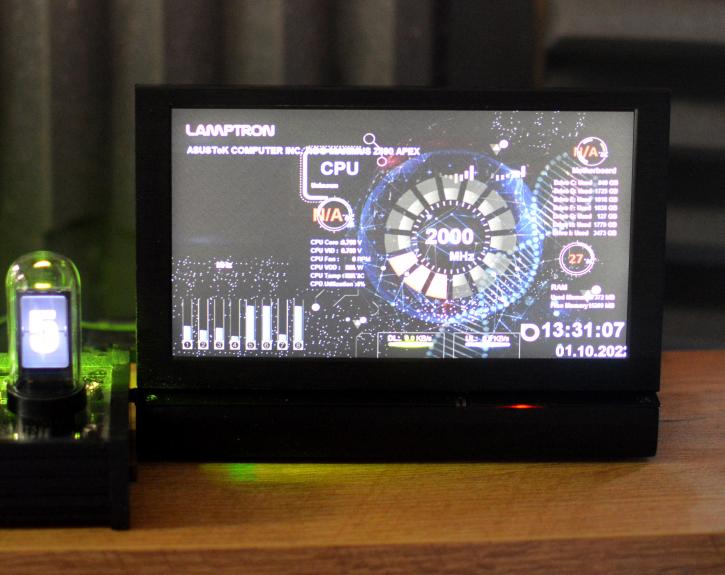
As for the setup, the HDMI and USB cables didn’t cause any problems. So, finally, here are some real-life shots. The TN panel makes your readings visible only at narrower angles. Lamptron suggests that the display can also be used inside your chassis. Well, I think the 7” is an ok size overall; but it would be hard to fit in most cases due to the lack of place for this piece of hardware (also, the viewing angles won’t help use that in a good way).
Soon as an HDMI connection and power is given, the unit turns on immediately. The remote has very good coverage even though you’re unlikely to be operating it at a significant distance. Lamptron provides two remotes, and the screen lifts or goes back at the press of a button.