Page 6
Setting Up a SLI configuration
In today's article we'll handle several SLI session so let's chat a little about how we can make this possible. Since we had six cards available before launch time we can offer you SLI results. We will hook up the reference cards of the same models in SLI mode.
If you have a new product then make sure you have the latest drivers on your HD. Grab them from our download section and preferably go with an official or WHQL (Microsoft certified) driver. First uninstall your current graphics card's drivers carefully. This is exceedingly important if the older graphics card was from a different chipset manufacturer.
That's all. Also important is to make sure you have the latest version of DirectX (9.0c) installed. If you experience compatibility issues, please make sure you have installed the latest version of your mainboard drivers, have a look in our extensive download section I'd say.
Latest software Downloads
- NVIDIA Cards - ForceWare drivers Forceware 80 and upwards recommended !
- Microsoft DirectX 9.0c
Now that we have collected all the essentials in software, let's have a look at the hardware. Power down the PC and pull out the power cable. Place your hand at the metal PC casing or PSU for a second to make sure you are static discharged. If you want to know what static discharge is then rub your hand on your carpet for a while and quickly point your finger closely to your girlfriends/boyfriends nose. Although a nice effect, it's not something you like to see happen with electronics as it will destroy it.
The first thing you need to do is prep your mainboard. You need to enable SLI mode, which can be done with that little SLI card that sits securely on your mainboard and needs to be be flipped around. Some manufacturers already ditched the SLI card and allow that change from the BIOS or even automatically.
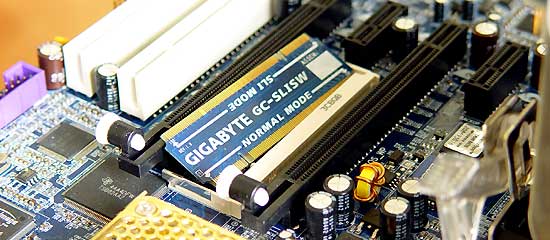
The Jurassic SLI selector card. Digital SLI selectors like some mainboard manufacturers offer are the way to go.
Insert the new graphics cards in PCI-Express slots, secure them with a screw and make sure that the little retention clip slightly above that PCI-Express bus is tightly secured. Once we are certain everything is okay and seated properly it's time to connect both cards together with the help of the SLI connector. You should have received this little connector with your mainboard. It is never supplied with the graphics cards. Mainboard differ, space between the cards therefore differs and that's why the mainboard manufacturer needs to supply it.
Connect the monitor to the upper card, boot up Windows and run the driver installation. For this review we used NVIDIA's 84.17 ForceWare drivers. Once the setup has finished, restart and you are almost set to go !
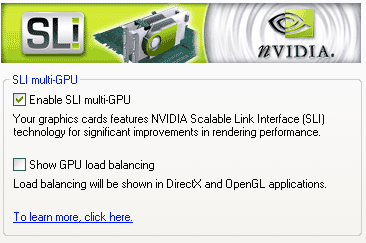
Once restarted you'll be asked if SLI should be enabled (above image). Um... yahaah! One more reboot and we are good to go and enjoy some serious power in our configured SLI rig. Congratulations, you are ready for some serious SLI action!
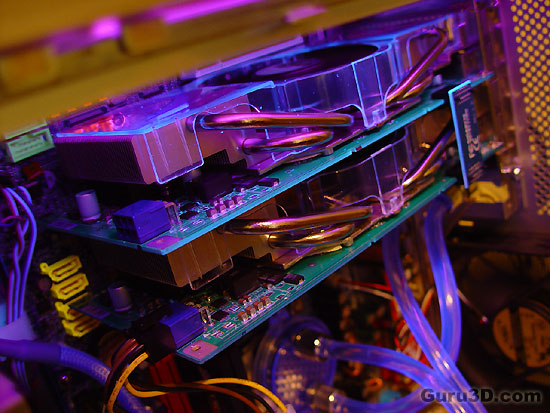
One hint, if you want to do SLI with the 7900 GTX's then please get some very decent cooling as your PC will need some seriously good airflow to get rid of all the heat these cards are producing.
