Stage 3 - Liquid Nitrogen (LN2)
Stage 3 - Liquid Nitrogen (LN2)
So before we start off I'd like to give the word to the main man himself, Beaux... explaining this little project a little better.
Hey Gurus! My name is Beaux Loy, you may know me as Bodar on the Guru3D forums and HWBOT. I met Hilbert about a year ago at the CES convention. He's a really great guy and I'm happy that we actually met in person! We talked about the technology industry and the convention for a while and that's when he first presented me with the idea of testing the EVGA SR-2 motherboard. I've been really thrilled about the opportunity ever since and today it's a reality! When I first started overclocking I used to think that all you had to do was slap on the LN2 pot and start pouring. After ruining a lot of hardware and many RMAs, sometimes viable and sometimes not, I finally found my niche. As an artist, musician, and a songwriter, overclocking became an art and by treating it as such, I was surprised and satisfied with the results.
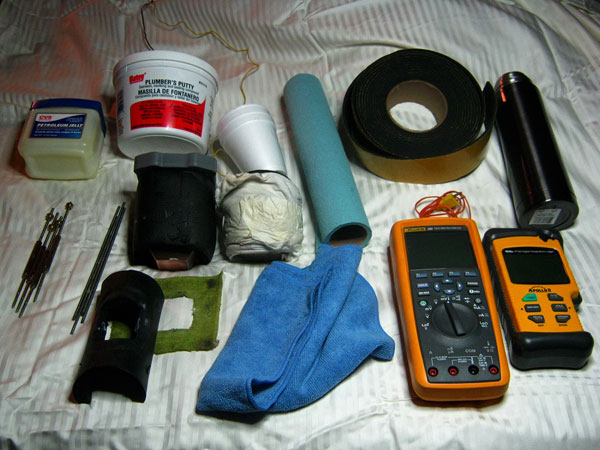
This is a list of everything you will need for LN2 benching:
- Microfiber towels
- Vaseline or dielectric grease
- Plumbers clay
- Flat sheet foam insulation
- Round tube foam insulation
- Tek-9 6 Slim
- Dragon F1 Extreme Edition
- A fluke multimeter. Any model that regulates below -200c. I use the K-type temperature bead probe
A quick guide on overclocking the x5680 processors:
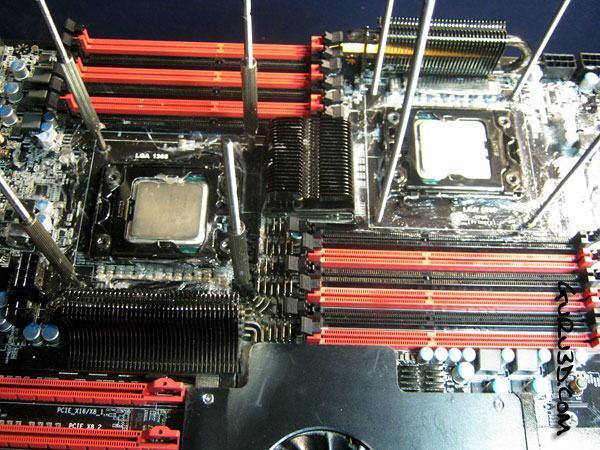
The x5680 CPUs are made for the 1366 platform. These CPUs are manufactured on the 32nm process which allows for cooler temperature and hopefully higher clocks. They have triple channel IMCs built into the CPU die. The PCIe controller is separate from the CPU, but is built into the chipset, the CPU and chipset are linked with a QPI. Xeon X5680 CPUs use Hyper-Threading Technology with 6 physical cores and 12 threads and a dual QPI. Perfect for the EVGA SR-2 motherboard alright.
Here are some of the more significant voltages we need to look after:
- VCore: The idea is simple really. Increase the voltage as you increase the core clock. I start with 1.82v at -100C
- DRAM: Increase this voltage to help with RAM speed stability. I usually set this to about 1.80v
- IOH Core Voltage: When increasing your base clock say above 180 or so, I usually set this from 1.20v to 1.30v
- QPI/DRAM Voltage/VTT: This voltage helps with memory timings and stability. You need to keep this within 0.5v of the DRAM voltage otherwise you could have a dead cpu on your hands. for instance 1.65 - 0.5 = 1.15. I usually set this to about 1.40v when starting the LN2 overclocking session as it leaves enough headroom for my memory to max out at about 1.80v - 1.90v
Here is a step by step procedure that I use before going subzero. Everyone has their own method. Here's mine. Ok, enough talk. Lets begin!
So here's where the article is going to change. We wanted this part to be extensive and descriptive. We'll show you all and everything, including the installation process, our nice assistant and the well over 500 liters of Liquid Nitrogen used on this project.
This is an exciting moment! Beaux: this is also a sad moment as I almost started to cry. Smearing grease all over this beautiful board : ) I've found that this is the best way to protect all components. You can use a toothbrush, Q-tips or a paint brush to cover the socket area.

A lot of benchers use molding clay but I found that a little grease and a cloth to soak up any excess water for long periods of time does the trick nicely.
