Product Installation
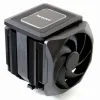
The Dark Rock Elite has seven copper heat pipes for heat conduction, further enhanced by a specialized ceramic particle-infused black coating.

This design is purposed to maintain optimal CPU performance, particularly during intense overclocking and in high-demand workstation scenarios. In terms of aesthetics and ease, the installation process stands out. The detachable mesh top cover, paired with an integrated middle fan, is designed for easy overhead insertion. This functionality, along with a black mounting kit comprising a pre-installed mounting bridge and fixing screws, complements the cooler's refined design.


Transitioning to the installation phase, Be quiet! has introduced some modifications to its mounting kit. Initially, for those utilizing Intel processors, you'll be tasked with setting up the corresponding mounting kit. Here's an overview of the assembly procedure:
- Insert four push-pin screws through the mounting bracket on the backside. Note that the lower position is designated for socket 115x.
- Affix a rubber washer to each pin for added stability.
- Depending on your chassis design, you might need to extract the motherboard. Ensure that the back plate's gaps align with the motherboard socket screws before pressing the mounting pins through.
- Proceed to mount four riser or standoff screws to firmly secure the back plate.
- Two horizontal mounting brackets should be attached to the block using two screws each.
- As you position the cooler, secure it using the linear mounting bracket. Notably, accessing the bottom screws requires a particular approach due to their placement. The solution involves using a long, magnetic-head screwdriver, which is included in the kit.
- Push the screwdriver through the designated alignment, affix the screw, and proceed to mount the linear horizontal bracket securely. Remember, the central fan should be detached during this phase.
- After securing the cooler, reattach the fan using metal clips and ensure that the top plate caps are returned to their positions.
- The final step involves connecting the fan cables to a y-splitter and plugging the resultant assembly into the motherboard's FAN header.
While the Pro 5 and Elite do make some accommodations for elevated DIMMs, certain configurations, like a high Corsair Dominator kit, might obstruct the last slot. The Dark Rock Elite cooler introduces a front fan mounting rail that offers adjustable height settings, permitting a clearance of up to 69 mm over the second RAM slot. Over the first RAM slot, the heatsink provides a clearance of 63.3 mm. Additionally, the edges of the heatsink have specific cut-outs to ensure compatibility with VRMs.

Enhancements to the cooler's efficacy are attributed to the dual Silent Wings PWM fans. These fans are equipped with 6-pole motors, and airflow-optimized blades. The front fan is engineered for maximal air pressure, achieved through minimal tip clearance between its blade and frame. The frame outlet, designed in a funnel shape, ensures optimal air dispersion, and the rubberized frame reduces vibrations, and by extension, noise.

Users are offered flexibility with a Speed Switch, allowing selection between Quiet Mode (with a maximum fan speed of 1500rpm) and Performance Mode (enabling speeds up to 2000rpm). For thermal performance, the cooler incorporates a black coating integrated with ceramic particles, facilitating optimal heat transfer. Aesthetically, the Dark Rock Elite incorporates ARGB LEDs on its top cover, providing a range of visual effects.

