Overclocking The Core i7 5960X on X99
Overclocking - The Core i7-5960X on X99
With so much ridiculous horsepower in the system we could not resist trying out overclocking. We're keeping it relatively simple. We need to take a couple of steps if we want to overclock. Invest in good hardware by the way, the cheaper motherboards often are not well tuned for enthusiast overclocking. Also get yourself a good power supply and proper processor cooling. Overclocking with Haswell-E was a little more difficult than we expected. Your voltage should sit at roughly 1.3 to 1.4 Volts with an AIO water-cooling, dual rad preferred. Mind you that overclocking 8-cores is a tough job, and our processor sample certainly is not a very good overclocker. The 5960X has a base clock of 3.0 GHz. At 1.3 Volts we end up at roughly 4.0~4.2 GHz. We need a hefty 1.375 ~ 1.425 Volts range to reach 4.4 / 4.5 GHz
Manual Overclocking
The true Guru3D audience overclocks from the BIOS and try to find the maximum stable limit. The generic overclock procedure for multiplier based overclocking is as follows:
- Leave base clock (bus) for what it is right now (if you enable memory XMP at 2400 MHz or higher, your base clock will jump to 125 MHz!).
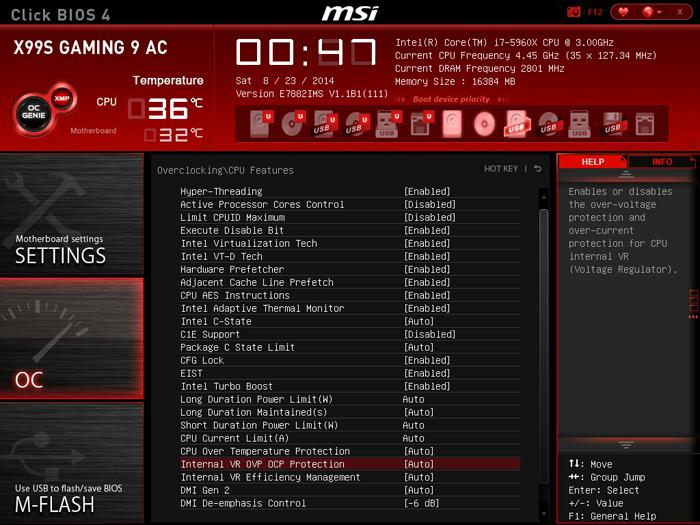
- If optional in the BIOS, increase your TDP limits of the processor to 250 Watts (by that you are allowing a higher power draw), mostly motherboards have this pre-configured pretty okay these days though.
- Set the per core Turbo multiplier at a maximum of your liking:
- example 2: 100MHz x 44 = 4400 MHz
- Example 2: 125MHz x 37 = 4625 MHz (of you have XMP enabled - you will be defaulted to a 125 MHz bus)
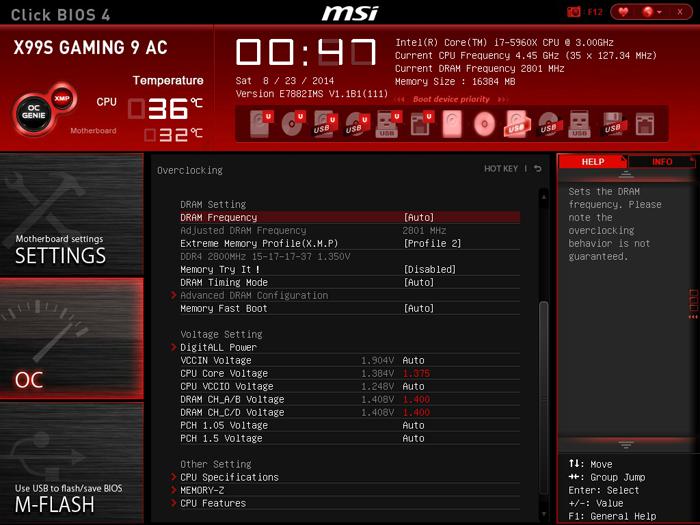
- Increase CPU voltage, though setting AUTO might work fine, we applied 1.3V on the processor to reach 4100 MHz and needed 1.4 Volts to reach ~ 4.5 GHz
- Make sure your processor is properly cooled (we used the Corsair H105 LCS cooler)
- Save and Exit BIOS / EFI
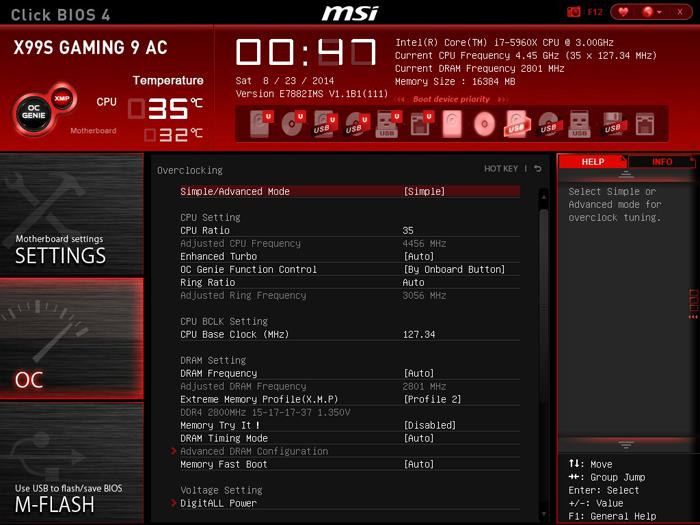
If you enable XMP memory 99% chance that your BUS speed will be altered to roughly 125 MHz - that does change the way you overclock.
Overclocking wise our sample isn't the best, we need a LOT of voltage to reach ~4400 MHz. During overclocking increasing the DDR4 Voltage could help you a bit on stability.
You should allow a baseline clock of roughly 4400 MHz that can actually still throttle down to 1200 MHz in idle, which helps us in power consumption. However, once the processor gets a kick in the proverbial nuts, it can turbo any or all cores towards that multiplier of 45 times that 100 MHz baseclock frequency, that's a 4500 MHz configuration.
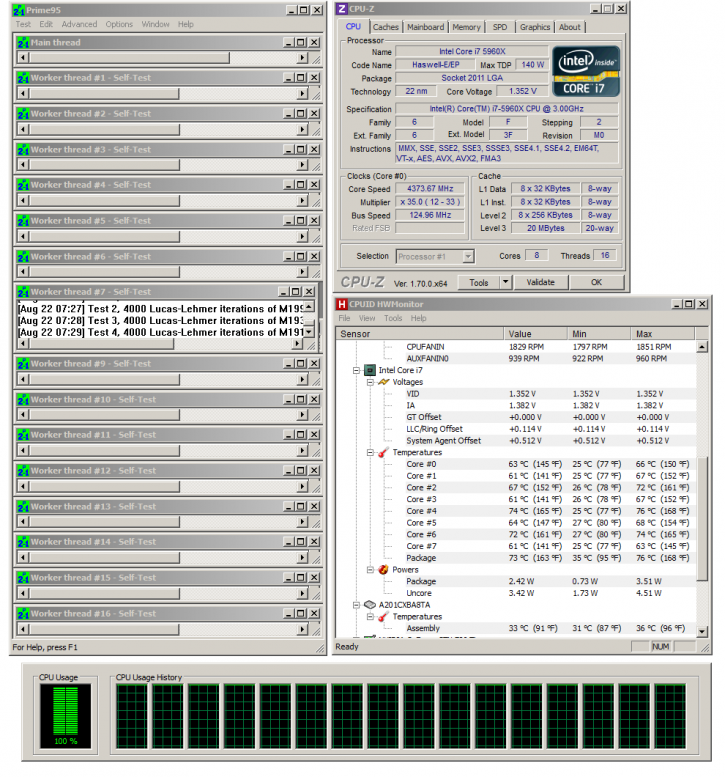
Here is an example at MHz -temps remain fairly OK for an 8-core proecessor and merely a Corsair H105 LCS cooler.
Above a quick look with a Prime95 stress test with all four cores active and stressed at almost ~4400 MHz. You'll need a rather reasonable cooler, eight-cores versus overclocking require a higher-voltage, and that creates more heat to deal with.
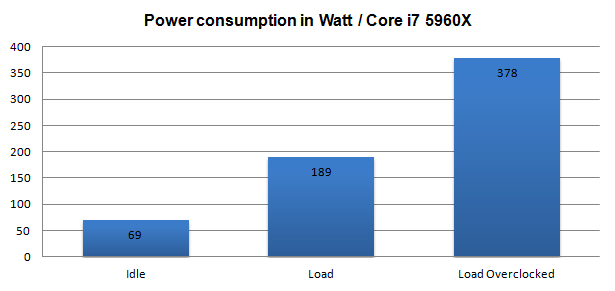
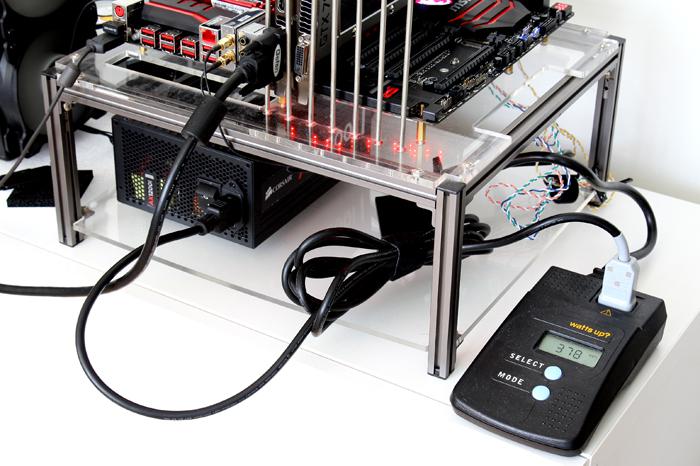
In the chart above you can see what will happen to power consumption. The 'Load Overclocked' was at ~4500 MHz which requires 1.425 Volts on the eight CPU cores. That is a LOT of voltage. So the 1000 MHz overclock made our power consumption double (under load). Let me clearly note here that this is the power consumptiopn for the PC measured at the wall socket power draw.