RivaTuner 2.0 - Creating Launcher Items
Creating Launcher Items
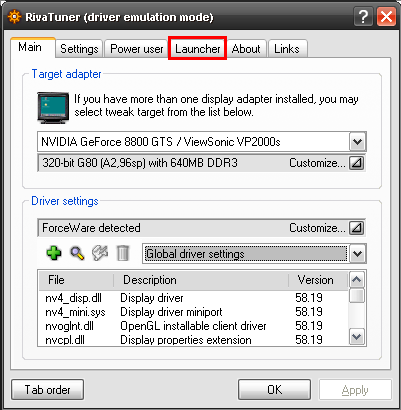
Close the current window, so that you are back where you started originally. Then select the Launcher tab at the top of the window.
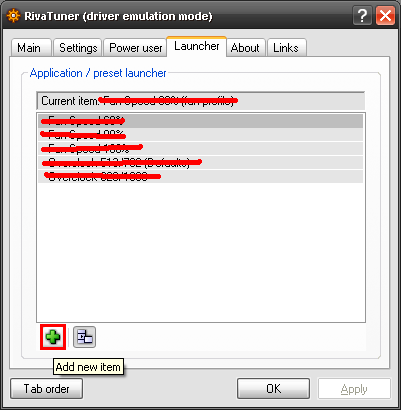
Now, we will create a launch item that will allow the program to call a profile youve created. Go ahead and click the plus sign icon Add new item (Ignore all the crossed out text, these are items we have not yet created).
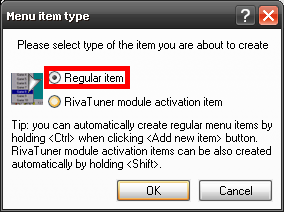
Then click the Regular Item radio button.
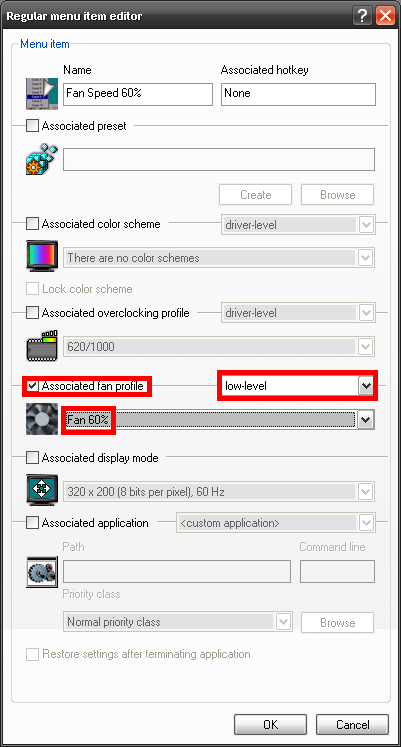
Now, you will be able to create a launcher item name and what profile it is associated with. Fill in the Name textbox with a new profile name: Fan Speed 60%
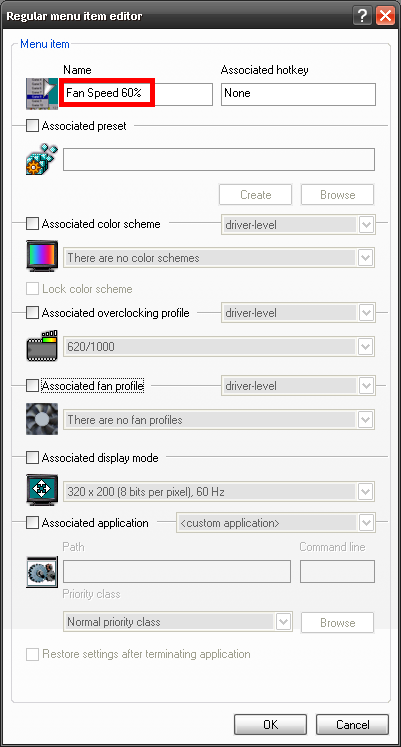
Then click the checkbox next to Associated fan profile, click the dropdown box and select low-level. This will give you the available profiles which we created earlier. Select Fan 60%
Go ahead and repeat the past few steps for Fan Speed 80% and Fan Speed 100% launcher items, so that the next picture looks similar to this. (Again, ignore the crossed out text)
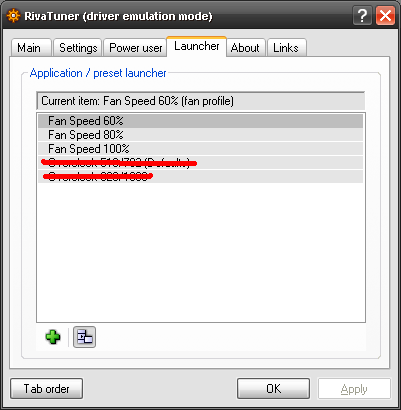
You will have now created 3 launcher profiles which call the 3 previous fan profiles we created. Next we are going to tell Rivatuner to adjust the fan speed based on the temperature of the graphics card.
