Windows File Recovery works on the command line (CMD) and is available in the Microsoft Store for version 2004, currently the latest, of the OS.
To date, users have relied on third-party applications to recover a file. Applications such as Recuva and Photorec are widely used for this. While these are third-party and Recuva has paid features, they do have GUIs.
If you can’t locate a lost file from your backup, then you can use Windows File Recovery, which is a command line app available from the Microsoft Store. Use this app to try to recover lost files that have been deleted from your local storage device (including internal drives, external drives, and USB devices) and can’t be restored from the Recycle Bin. Recovery on cloud storage and network file shares is not supported.
Note This app requires Windows 10 build 19041 or later, the file download will commence through the Windows App Store.
Basic steps:
- Press the Windows key, enter Windows File Recovery in the search box, and then select Windows File Recovery.
- When you are prompted to allow the app to make changes to your device, select Yes.
-
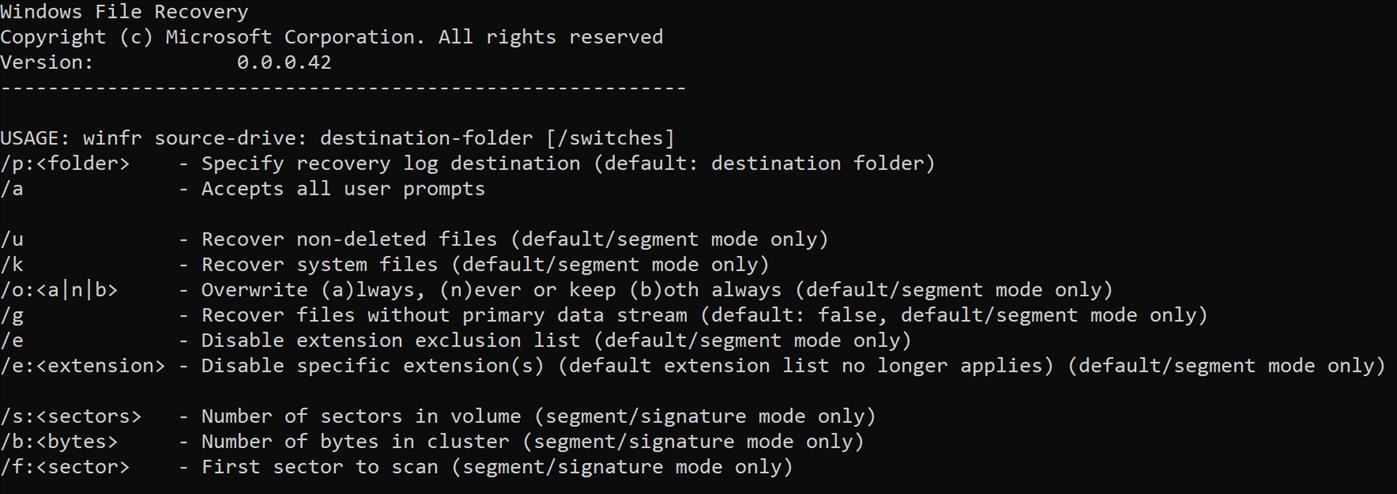
In the Command Prompt window, enter the command in the following format:
winfr source-drive: destination-drive: [/switches]The source and destination drives must be different. When recovering from the operating system drive (often C: ), use the /n <filter> and /y:<type<(s)> switches to specify the user files or folder.
Microsoft automatically creates a recovery folder for you called, Recovery_<date and time> on the destination drive. There are three modes you can use to recover files: Default, Segment, and Signature.
Default mode examples; Recover a specific file from your C: drive to the recovery folder on an E: drive.winfr C: E: /n \Users\<username>\Documents\QuarterlyStatement.docxRecover jpeg and png photos from your Pictures folder to the recovery folder on an E: drive.
winfr C: E: /n \Users\<username>\Pictures\*.JPEG /n \Users\<username>\Pictures\*.PNGRecover your Documents folder from your C: drive to the recovery folder on an E: drive.
winfr C: E: /n \Users\<username>\Documents\Don’t forget the backslash (\) at the end of the folder.
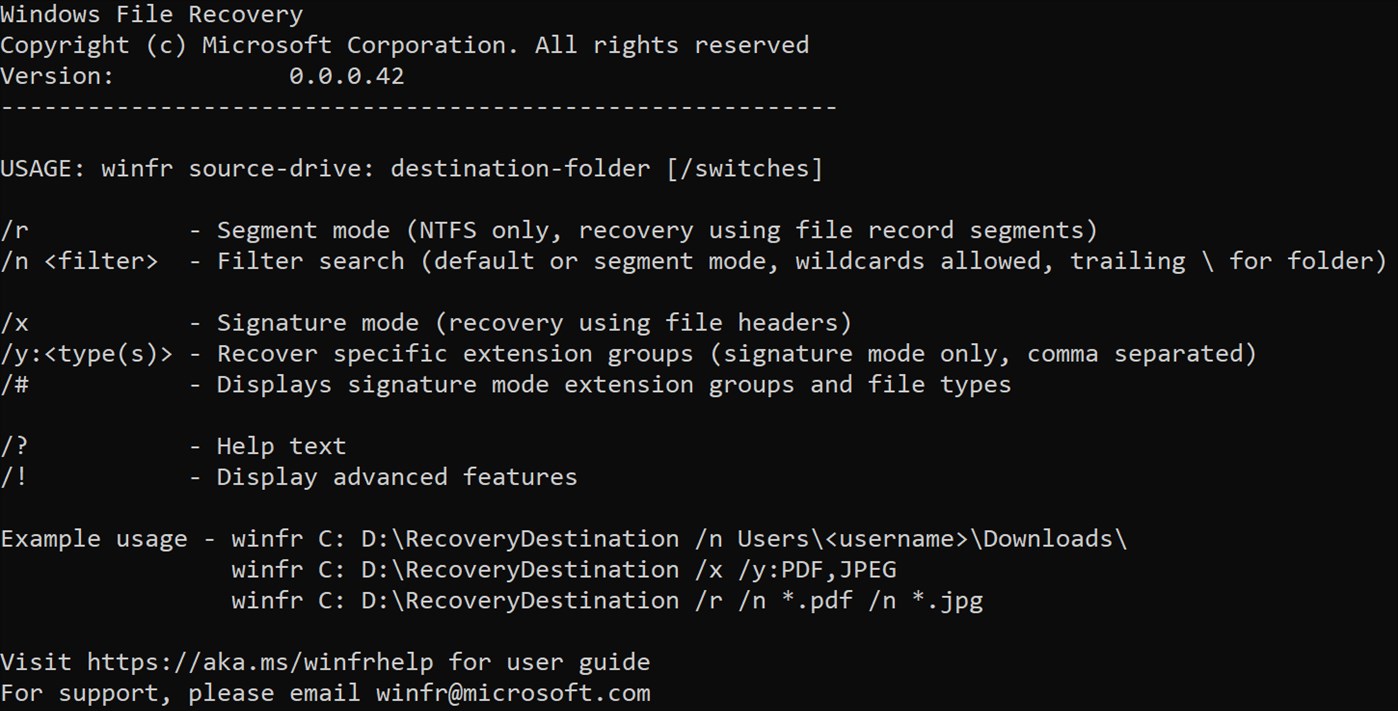
Segment mode examples (/r)
Recover PDF and Word files from your C: drive to the recovery folder on an E: drive.winfr C: E: /r /n *.pdf /n *.docxRecover any file with the string "invoice" in the filename by using wildcard characters.
winfr C: E: /r /n *invoice*Signature mode examples (/x)
When using signature mode, it's helpful to first see the supported extension groups and corresponding file types.winfr /#Recover JPEG (jpg, jpeg, jpe, jif, jfif, jfi) and PNG photos from your C: drive to the recovery folder on an E: drive.
winfr C: E: /x /y:JPEG,PNGRecover ZIP files (zip, docx, xlsx, ptpx, and so on) from your C: drive to the recovery folder on an E: drive.
winfr C: E:\RecoveryTest /x /y:ZIPWhen you are prompted for confirmation to continue, enter Y to start the recovery operation.
-
Depending on the size of your source drive, this may take a while. To stop the recovery process, press Ctrl+C.