5
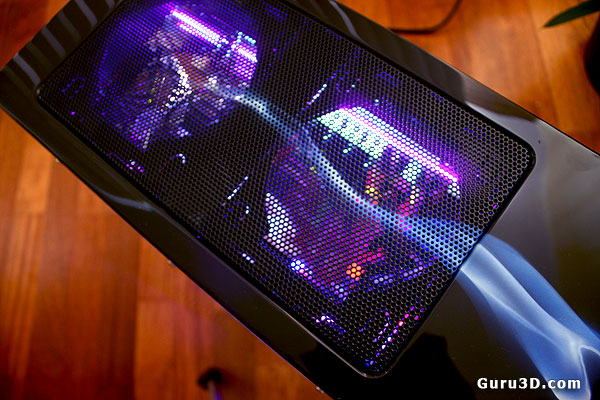
So that's the future location of a radiator. It's already smoking though ;)
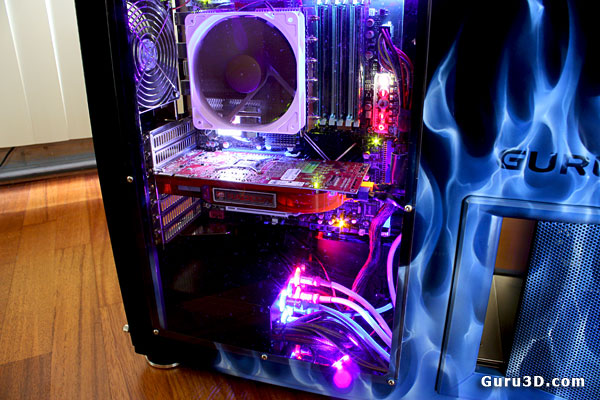
We put the side-panel back in. I probably should have used a dark colored graphics card, but heck .. it already starts to look pretty amazing don't you think ? Try to imagine this with transparent tubing (water-cooling) with UV reflective blue coolant and a UV light.
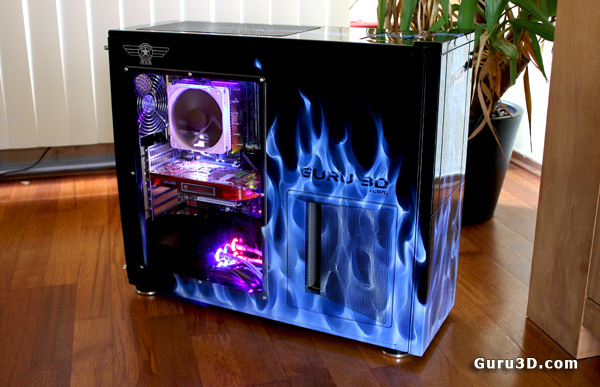
Okay guys and gals the last photo .. that's it for now.
Thank you all for emailing me and inquiring about this system, we had a good number of you guys asking us to show some more photo's on this internal project. Please consider this phase one of Project X. As in the coming months we'll integrate water-cooling into the system which is another big overhaul for this test PC.
I hope you guys enjoyed this little article. Obviously taste differs very much, but this test system is very close to me as it's based on my own design. and preferences. So forgive me if I'm being a little subjective here :)
You guys will be seeing a lot of this system in the coming year. We loaded it up with very extreme hardware making sure if can keep up with the latest technology. And as such you'll notice this rig in a lot of future reviews for sure.
Final components used:
-
SilverStone Chassis
-
Smooth Creations paintjob
-
ASUS Rampage II Extreme ROG X58 motherboard
-
6 GB OCZ DDR3 1600 MHz
-
1200 Watt PSU
-
1x 150 GB Raptor (ATI VGA test OS)
-
1x 150 GB Raptor (NVIDIA VGA test OS)
-
1x 150 GB Raptor (64-bit platform / memory testing)
-
Noctua CPU Cooling
I quickly want to say thanks to Jim and Mario from Smooth Creations who have been awesome along the designing stage. If you liked this paintjob, go give them a visit at their website.
Update: we continued our water-cooling implementation here in another article, check it out.
- If you like this article please digg it.
- Leave/read comment on this product
- Sign up to receive a notice when we publish a new article
- Or go back to Guru3D's front page
