
ClockTuner for Ryzen (CTR)
ClockTuner for Ryzen (CTR)
CTR (ClockTuner for Ryzen) software allows each user to customize the system with maximum energy efficiency. In this case, CTR is fully automated and does not limit the user in actions. The program has a kind of artificial intelligence, which will help in any situation, and the protection system will monitor each step so that your components were not exposed to danger. CTR is compatible with all motherboards on the AM4 socket, despite the artificial limitations of AMD. As for conditions, there is one thing - the processor should be based on Zen 2 architecture.
The main principle of this software is to evaluate the quality of each CCX and adjust the frequencies individually. Prime95 with a number of special presets assesses the stability of each CCX. A step-by-step frequency algorithm with multiple rules allows you to select the most stable frequency for all CCXes simultaneously without disturbing the energy balance between the CCX. CTR also contains a plug-in (optional) test package Cinebench R20 from Maxon, which will evaluate the results of the tuning.
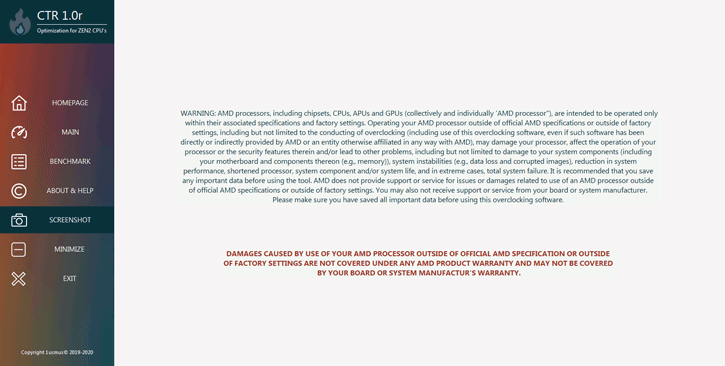
After running ClockTuner for Ryzen, the program meets the user with information that any manipulation (overclocking or undervolt) may damage the CPU or motherboard. Fortunately, this is a standard text that must be present in software products with similar features.
The main and working tab is called MAIN, it contains all information about the processor, controls, and log.
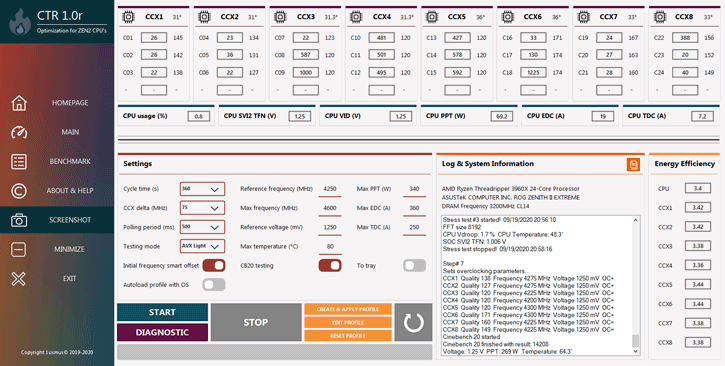
The upper information bar informs the user about the number of CCXs, cores in the CCX, the frequency of each core (3), the temperature of the CCD (1), and CPPC tags (2). Let me remind you that CPPC tags are a kind of indicator of core quality. C01 is a kernel sequence number.

Then comes a strip with information about the current energy parameters of the processor (PPT, EDC, TDC, CPU VID Voltage, and CPU SVI2 Voltage). The monitoring of these parameters as well as the protection system is always active.
* At the moment there is a bug that does not allow to display the correct EDC value in some scenarios. At a certain value, it just goes off the charts. This is due to an error in the microcode, i.e. I cannot fix it.

The "Settings" group contains all settings. Let's talk about them in a bit more detail.

Cycle time - defines the time of stress tests for each cycle. The longer a cycle lasts, the more accurate the CTR result will be.
CCX delta - the condition for termination of the overclocking or undervolting algorithm. It is the value (MHz) of the frequency difference between the best CCX and the worst CCX. This value allows the energy load to be equalized between all CCXs. Each processor class (Ryzen 5, 7, 9, etc.) has an individual value. At the first start CTR will automatically offer the best option. The user can also customize this value for his own experiments.
Recommended values:
- Ryzen 5 : 25 MHz
- Ryzen 7 : 25 MHz
- Ryzen 9 : 150-175 MHz for X-Suffix processors and 100-150 for XT-Suffix processors
- Threadripper : 75 - 100 MHz
Testing mode - defines the load level that CCXs receive during CTR operation. For most users, the AVX Light mode will be optimal. There is no need to be afraid of the word "AVX" in the title. Specially designed AVX presets combine low processor temperature with high-efficiency diagnostics.
Initial frequency smart offset - is a technology that saves time during overclocking or undervolting. The mechanism of operation is the intelligent shift "Reference frequency" relative to CPPC tags. It is supported only by 3900X, 3900XT, 3950X, 3960X and 3970X processors.
Reference frequency is the base frequency from which the first overclocking or undervolting step will start. The value must always be a multiple of 25, i.e. 4100, 4125, and so on.
Max frequency is the maximum frequency value at which any CCX will complete the overclocking or undervolting process. The value should always be a multiple of 25, i.e. 4100, 4125, and so on.
Reference voltage - the voltage value at which the overclocking or undervolting will be performed. Step 6 mV. The Protection System automatically corrects this value so that the processor always receives only the correct commands.
* I want to pay attention to the owners of processors 3600XT, 3800XT, and 3900XT, that the voltage above 1250 mV can cause BSOD during the CTR. I recommend not to exceed this value temporarily.
Polling period - the time of interrogation of sensors (temperature, voltage, frequency, and so on). Also, this value determines the reaction speed of the CTR protection system. The protection system functions from the moment of the program start to the moment of its completion. Its purpose is to monitor all processes that occur during the CTR and in case of which to automatically stop and consult the user.
Max temperature - the value of temperature at which the protection system will stop all processes that take place in the CTR.
Max PPT, Max EDC, Max TDC - consumption and current values, which also relate to the settings of the protection system. When one of the values is reached, all CTR processes will be stopped. Be careful, these values do not apply to PBO and do not affect the performance of the system.
CB20 test - a switcher that allows the user to activate or deactivate the Cinebench R20 test. This test is only for overclocking or undervolting evaluation.
To tray - activation allows to minimize CTR window into the tray.
Autoload profile with OS - automatic loading of the overclocking or undervolting profile at startup of the operating system. It is possible to activate it only after the user has saved the profile. Please note that the user will be offered to create a profile only after the overclocking/undervoltage process is finished.
Just below the "Settings" group, there are control buttons.

The "START" button is used to start the overclocking or undervolting process (depending on the selected user settings).
The "DIAGNOSTIC" button is used to evaluate the energy potential of the processor. The result of work is information in the log and correction of starting values. It does not require any settings from the user. It should be used before the START button is pressed.
The "STOP" button - stops all processes immediately.
The button "CREATE & APPLY PROFILE" - allows the user to record/record the results of overclocking or undervolting in the profile. It becomes active only after the CTR has successfully completed the overclocking or undervolting. Also, the "CREATE & APPLY PROFILE" button automatically activates profile loading at OS startup.
Button "EDIT PROFILE" - allows you to edit an existing profile or create your own manually without lengthy experiments (of course, at your own risk).
Button "RESET PROFILE" - allows you to clear all the information that is in the profile.
The button "with a circular arrow" is designed to reboot the system immediately. It becomes active only in a situation where the CTR protection system cannot solve the problem itself.
There is a Progress Bar under the function buttons. And there is a log to display information about all actions.
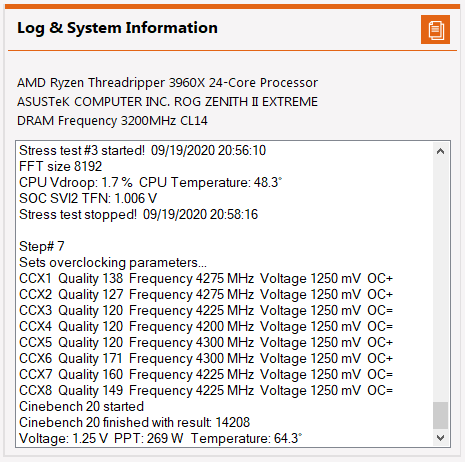
In the upper right corner, there is an orange button that allows you to copy in 1 click all the data that is in the log. The log data is also written in a text file ctr_log.txt .
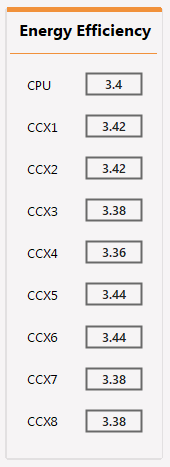
Energy Efficiency - contains frequency ratio data relative to the current voltage. The higher the result is, the better.
The next tab that you will visit frequently is called "BENCHMARK".
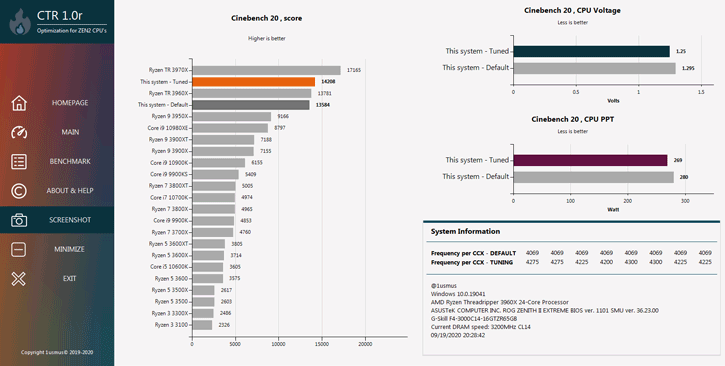
It contains the Cinebench R20 test results obtained before and after "tuning" (This system - Default). Also, on this tab, you can find information about the system where the results were obtained.
