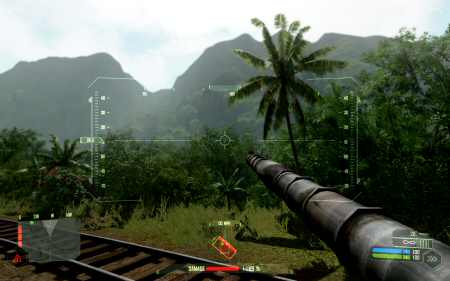
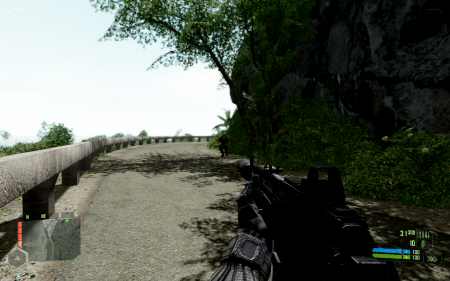
About one and a half years ago, Crytek shocked the PC gaming world with its first-person shooter Crysis - not only with its beautiful and impressive graphics, but also with hardware requirements which were both out of this world. Today, it is still a very popular game, partially because of its expansion Crysis Warhead, and more than likely since hardware is finally catching up to the insane amounts of polygons this game is able to draw on your screen, too. Besides that or maybe because of that, there exists a very active modding community for it, creating configuration files to squeeze additional fps out of it, building custom maps, or other mods to change the look and feel of the game.
Today, I am presenting you one of these mods, called: Real Lifesis, developed by Hawkeye|Puppy over at Crytek's official modding portal, Crymod. What's so special about this, you ask? Well, this is not your standard configuration file that tweaks a few settings (although there comes one included with this mod, too), but it is a so-called "ToD modification". ToD stands for "Time of Day" and by using a custom one, Real Lifesis basically alters the whole atmospheric lighting to make Crysis look much more realistic. Therefore, Hawkeye|Puppy had set himself this main goal: "I have set the task of creating a Full-Day Time of Day file, that brings Crysis as close to photorealism that you can get..." Have a look and decide for yourself, whether he was able to succeed or not:
In order to get Crysis to look as nice as that on your PC as well, just follow these step-by-step instructions:
1) Install Crysis (the location/directory does not matter).
2) Download the installer for Real Lifesis, here.
3) Start the installer by double-clicking it.
4) Click on "Accept" and then "browse", in order to select the folder in which you installed Crysis. ("D:\Crysis" for example)
5) After the installer is finished and exits, browse to your game folder.
6) Open your Crysis folder and browse to the subfolder "\Game\Levels".
7) You should see the following list of files in there: RealLifesis_Blink1.exe, RealLifesis_Blink2.exe, RealLifesis_FG1.exe, RealLifesis_FG2.exe, RealLifesis_ToD1.exe, RealLifesis_ToD2.exe
8) Choose one of these files to install the ToD modification Real Lifesis. Under Vista install it by selecting "Run as Administrator" (right-click). (I, personally, recommend RealLifesis_ToD2.exe.)
9) Done. Start Crysis and enjoy it.
Download: click here.
Having played with these different versions of Real Lifesis for a while already myself, I can recommend you one particular console command that might make your life a lot easier, in case you don't like the heavy blur effect this modification uses: "r_depthoffield". The default value, when you install Real Lifesis, is set to 2. Try "r_depthoffield 1" or "r_depthoffield 0" in the in-game console, accessible by using the "~" key, to reduce the blur effect or to turn it off completely. Of course, you can just add this command to the autoexec.cfg, which this game creates in the Crysis folder, and don't worry about it anymore, the next time you start the game.
(This modification was created by Hawkeye|Puppy, the config and Cvar files by Helder Pinto [HP], and last but certainly not least, the installer by zeropoo. It was only designed for Crysis and does not work properly with Crysis Warhead.)
