Page 2 - Technology & Installation
The technology behind it all
Let's have a look at the technique used. I already told you that it is somewhat based on 'refrigerator' technology right? Asetek calls this their VapoChamber technology. Gotta love marketing, as in Vaporize that heat! In all honesty this is a combination of the technology used in refrigeration and actually phase changer coolers. When you look closely at the the cooler you'll see copper pipes and cooling ribbons. An internal gas is inside these pipes and flows from the chamber upwards towards the cooling ribbons where heat will be dissipated with the help of airflow. I'm quite confident that the gas used is HFC 134a (R134a). Due to its low impact on the ozone layer it's not very toxic, although any coolant is dangerous I guess. R134A is a single hydro fluorocarbon or HFC compound.
The cooling method is all based around circulation. Although we just named it gas it's initial cold state R134a is in a fluid like state. The refrigerant material (R134a) is unusual in that it has a very low boiling (or vaporising) point well below 0°C at atmospheric pressure and a freezing point more than 100°C below zero. It is liquid when cold but easily becomes a vapor when heated and vice versa.
By absorbing heat from the processor, the fluid will dissolve and form into gas which travels towards the top of the pipes. Once the gas is cooled down it'll turn into a solid fluid form again and travels back to the bottom of the CPU cooler. The recirculation of the coolant is based on gravity.
So the evaporation chamber absorbs whatever heat energy is available to it from it's surroundings to vaporize the refrigerant.
The Package
So what do we get ?
- VapoChill Micro
- Special designed low weight fan duct.
- Ultra Low Noise fan.
- Fan plug pins
- Instructions
- PCI Bracket with molex passthrough connector (6-12V / 1-24W)
- Socket bracket ( depends on the version you buy )
- Fan and controller wiring
- one packaged screw, really! :)
- A small manual covering the basics
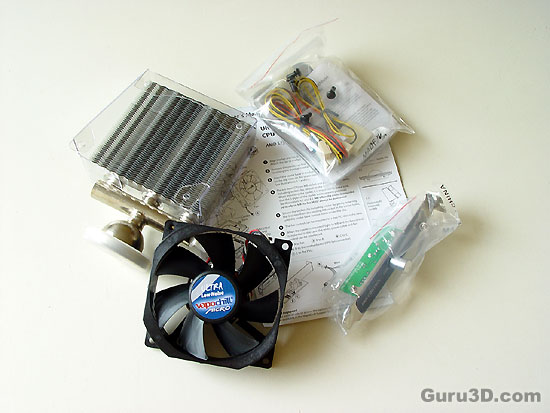 The gear you'll find inside the packaging.
The Installation
Now then, when we can believe the Asetek website installation of this cooling unit can be done in roughly 30 seconds. Okay, I have a stopwatch, let's do a little race and time it!
3-2-1... Go ! - unscrews two screws from the mainboard, fit plastic cap over the cooling ribbons, secure fan onto plastic cap, placed the metal shim over the cooling chamber, place the unit on top of the CPU, aligning the position of the ribbons downwards, wiring is positioned wrong on the backside, fan need to come off again, wiring fixed, plastic cap back on, trying to secure the fan with the two screws... fu** the plastic shim is in the way and blocking one screw, removing plastic cap again. Secured the two screws, install plastic cap again, plug in wiring to mainboard, plug in wiring to fan, plug in wiring to control switch, connect wiring to the power supply... STOP TIME!
| Installation time according to Asetek website: | ||
| Gamers | 30 seconds | |
| PC experts: | 30 seconds | |
| Beginners: | 30 seconds | |
| Professionals: | 30 seconds | |
| HW enthusiasts: | 30 seconds | |
| Overclockers: | 29 seconds | |
| P4 S478 clip: | 30 seconds | |
| P4 LGA775: | 30 seconds | |
| AMD K8 clip: | 30 seconds | |
| Installation time done by: | ||
| Hilbert | 453 seconds !! | |
Good, we overclockers save one second, that's a huge plus right :)
Hahah thirty seconds? ...not a chance. You'll be assembling and fitting this cooler for at least 10-15 minutes. All intended humor aside, granted installation is easy though and the best thing is, there's no need to access the backside of the mainboard.
