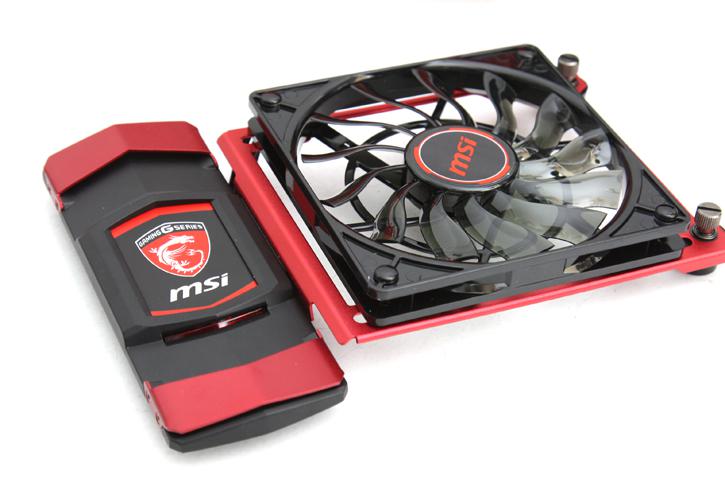
Product Showcase
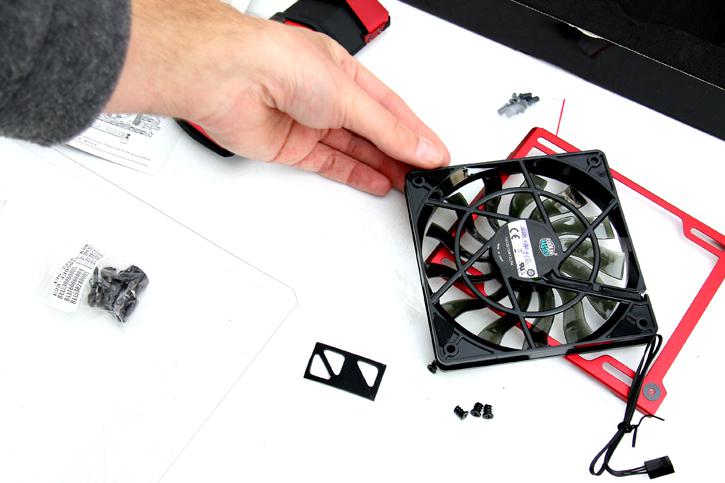
Installation: You mount the fan to the bracket first. Do not forget to apply four rubber inserts that sit in-between the fan and the metal bracket, that way the fan will not resonate. The fan will need to be powered by one of your PWM FAN headers on your motherboard.
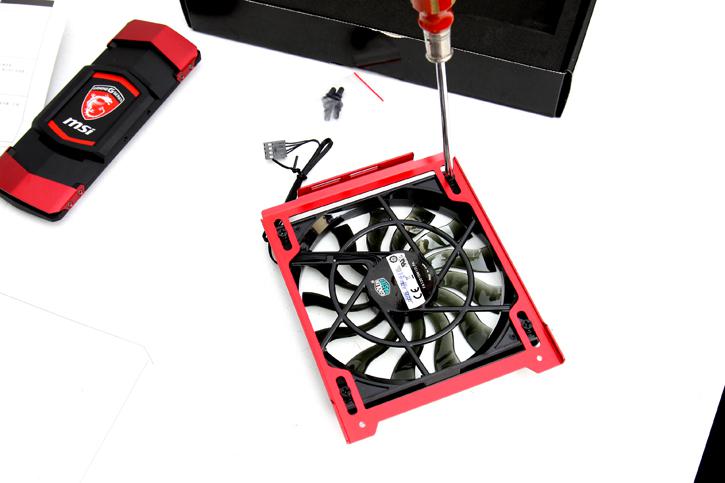
As you can see you can slide the fan to your most preferred location, this gives you a little more spacing to work with as hey, each card is different with heatpipes and cooling.
Once you have your fan in place, we can mount the bracket towards the SLI bridge, two screws it all this takes. Easy enough.
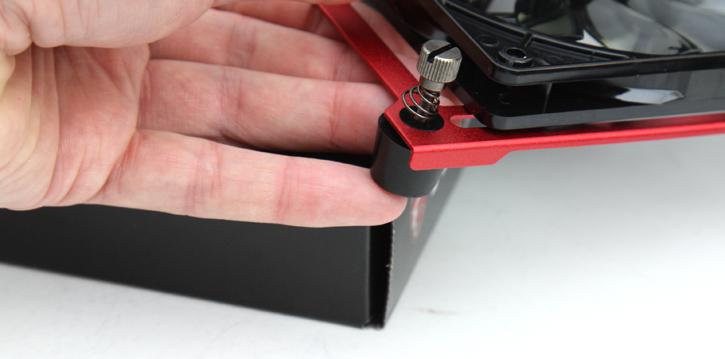
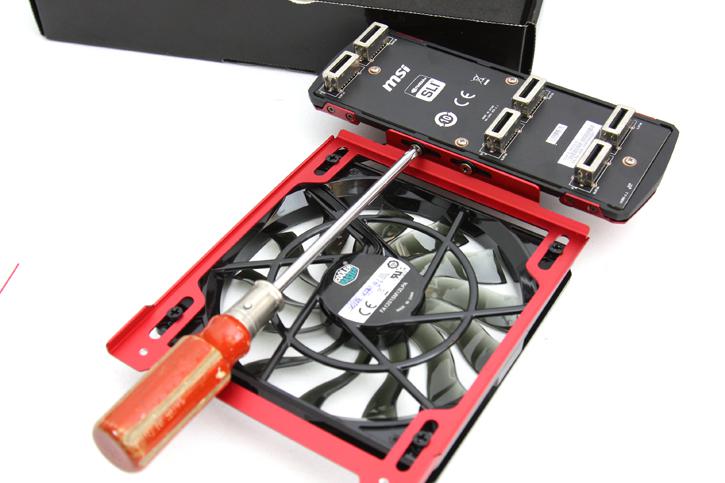
On the top side we now can install some spring based rubber rests, this is the lower part of the bracket and these rubber rests sit on top of the graphics card. Spring based again to prevent resonating.
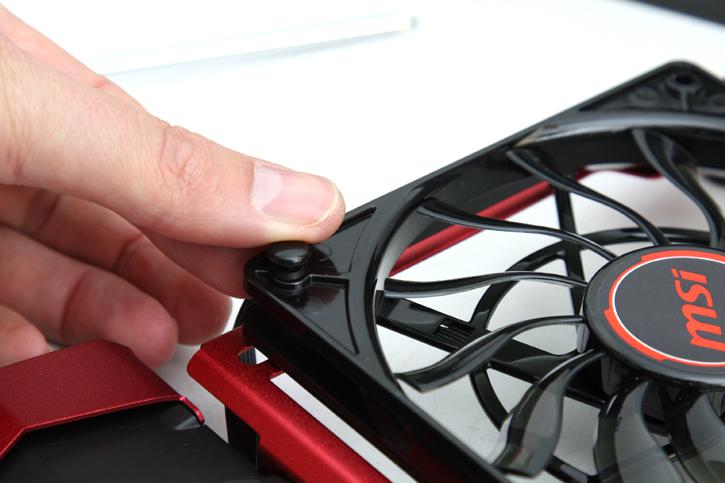
At the top side you can see the mounting holes for the fan, take the four inserts and push them in This is for aesthetics reasons only.
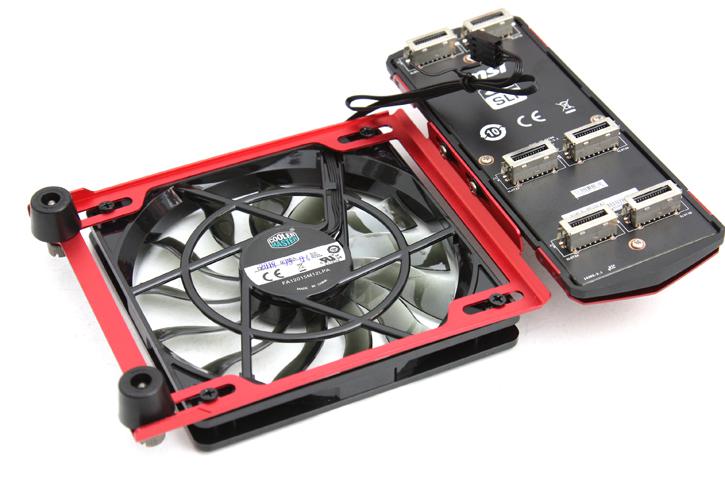
And that's it, the bracket is ready for usage. The included fan will blow cold air towards the fans and over the graphics cards. Not at all a bad idea really as 3/4-way setups can really bring a GPU to the boil due to bad airflow. You connect the fan towards a PWM FAN header on your motherboard. At normal settings it'll remain nearly inaudible whilst blowing some extra cold air over that graphics card setup of yours.