VC2600 installation
The installation
The manual covers the installation and has a guide for the included material, but I did find it a bit confusing. I do believe that it needs a bit clearing up. The manual is the cardboard that is used as the cover for the packaging. Unfolded, it reveals the manual. To install the heatsink, you need to identify what card you are using (in case you dont know :-P) and allocate the relevant parts. What confused me was that the manual mentioned a clip c that was to be used for some of the cards. I wasnt able to find a clip c, only a clip a and a clip b. After reading the manual a couple times more, I understood that there wasnt a clip c like the two other ones, but infact, you had to use springs with some screws in order to make the necessary clip c. However, I wasnt able to find those screws in the accessory bag, even if the manual did mention them and had a picture in it.
For those that are afraid of the installation. If it is the first time that you are going to change a cooler, you should know a few tips before hand. Firstly, ground your self by touching an unpainted metal part of your PC case, with the PC off, but still connected to the mains. Then, you will need to take the card out and take off the cooler of the card. My experience only covers the reference cooler of the GeForce 6800GT though, sorry. For the nVIDIA 6800 reference cooler, you will first need to take off the heatsink cover that usually has all sorts of designs and fancy graphics. This is done by removing some small screws that are around it. Then, unscrew the fan assembly located on the left of the card. Now flip the card over to the other side, and start unscrewing the spring screws that hold the RAM heatsink in place. Unscrew just a little bit of each screw at a time, not the whole screw at once, otherwise, the heatsink could apply pressure unevenly. Don't worry about the RAM heatsink though. At least mine didn't apply much pressure. Now, for the GPU heatsink. That is secured by using 4 spring screws. Just as before, just a bit of each screw, untill all four of them are out. Then, for the love of what is holy, don't pull or yank the heatsink out. (And that goes for every kind of heatsink) but instead try to turn it clock wise and anti clock wise to loosen the paste a bit and then take it off. In case the heatsink doesn't come off, it is probably just stuck on the wax like thermal pad. Just use a hair blow dryer to warm the heatsink and so make the paste loose.
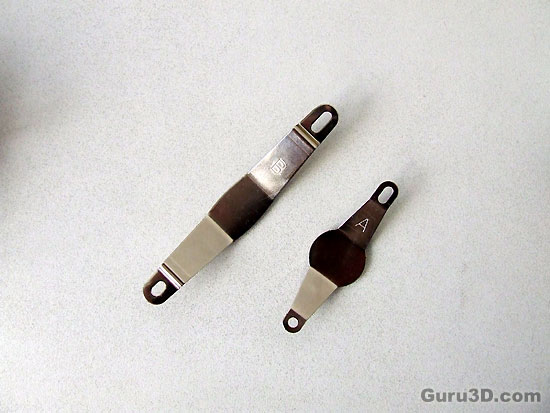 These are the two clips A and B that need to be used for the heatsink to be mounted.
Now, since my card is a GeForce 6800 GT, I used the Clip B. The way that this cooler can be mounted on a lot of cards is by having its back full of different set of holes, all labeled, that you screw spacer like screws in, which in turn you screw the final screws on them to hold the heatsink in place.
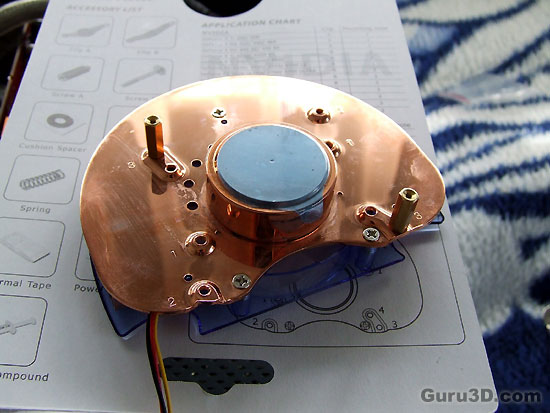
The holes are labeled, and need to be matched with the guide in the manual, according to which card you are using. GeForce6800 uses the holes numbered 3
After that, turn the card around so that you can see the back side. Then, two thin screws need to be used along with the clips. The clips are equipped with rubber on the side that is going to touch the card so dont worry about conductivity or anything breaking. You need to pass the thin screws through the holes in the clip, and then screw them on to the two screws on the heatsink. Sounds easy doesnt it. Well I had a bit of trouble there, as one of the thin ones didnt want to get screwed. (Ed: I'm leaving that line in for my own childish amusement :-)) The one on the heatsink didnt sit perfectly vertical, and it wasnt the screws fault as Ive used the other one in that hole and it was still the same. After some struggle I did manage to put it together. The power cable for the fan, is a 3 lead one, so that you can connect it to your motherboard and get an RPM readout as well.
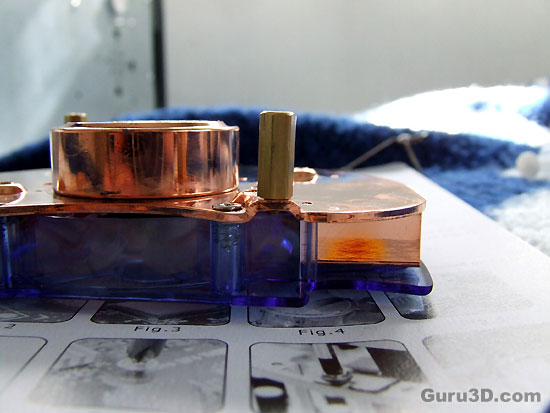
As you can see, it is not really vertical.
This is how the thin screws and the clip apply pressure to keep the heatsink in place.
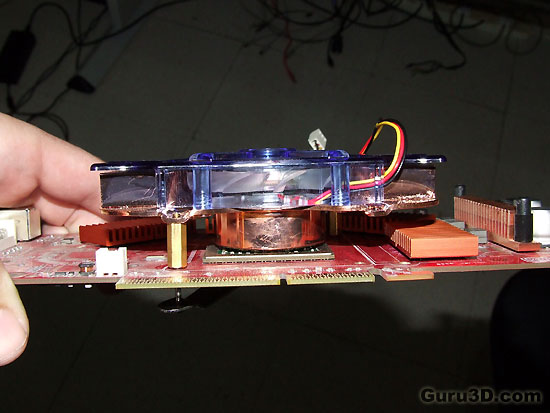
Also, while this cooler might seem that it is a single slot one, it is not. It will eat up the slot next to the card.
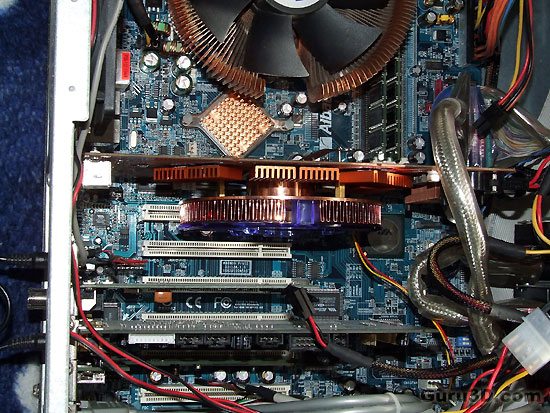
While in the case, PC off.
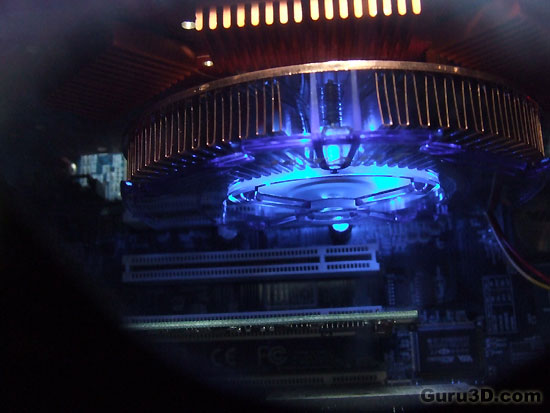
People that like lights in their rig are going to like this one. The heatsink emits a blue light when it is on.
