Installation and setup continued
Installation continued
To take the front bezel off, you will need to take the other side panel off as well to reveal 3 black plastic clips that are on either side of the case. You need both sides off to see them. Now push those to unclip the front, and then pull it towards you. This is done so that you can take the plastic covers for the optical drives out easily. By removing the front you also gain access to the front 12cm fan assembly.

This is the front case fan, equipped with a plastic filter. See that LED that is just under the USB ports? That is for the projector. The fan is easy to come off, it is just being held there by clips. If you press them with minimal force, the plastic cage with the filter comes off.
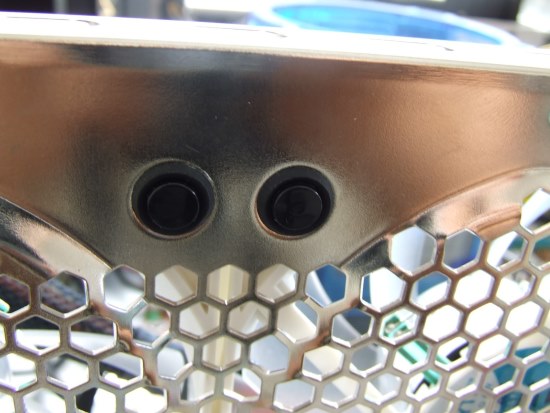
Since we are talking about the case fans, there are two 12cm ones on the back. Now this case is supposed to be a silenced one, so guess how the fans are mounted. No screws used. Instead small plastic rods are used that are cushioned by rubbers.
I had a little bit of a problem though with the case fans. You see the three of them are connected together and combined into a single cable that ends up to a 3 pin cable that you can connect to the motherboard. The motherboard though didnt have a header close enough, so I couldnt connect the cable to a free header. So I took it apart (since the fans are not soldered, but instead use their headers and connect to each other with an extension cable) but their cables werent long enough to reach a fan header. The problem was solved by combining the two case fans on the back together and powering them through a power header on the motherboard and powering the front one directly from the PSU by using a 3pin-to-molex adaptor.
The case has its own I/O shield that in my case was unnecessary since my motherboards I/O ports were different from the shield that came with the case. All you need to do is take the shield that you are already using from your previous case. (Should have been included with your motherboard).
Ok, so now you have the motherboard mounted. Next comes the hard drives and the optical ones. Their assembly is supposed to be tool less, and it actually is.
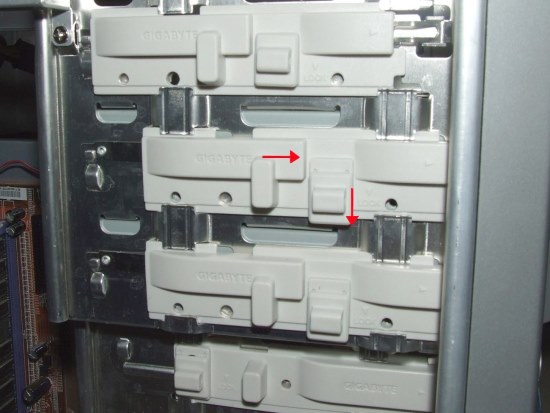
Once you have your optical drives in place, all you have to do is push the white plastic slide all the way front to lock the drive in place and then push the small locking mechanism (that has lock written on it) downwards.
Same thing with your floppy drive. (Yes, some people still have them).
Next the hard disks. Now they actually need a little preparation, but again it is tool less and wont take more than 1 second. All you have to do is take two of the black HDD installation sticks for each hard disk you have, and attach them. Each runner has two metal rods that protrude from the side and that are supposed to touch the hard disk and are then aligned to the HDD's screw holes. Just push them in. Thats it. All you have to do is slide the hard disk in it's place (Just above the tool box. If you have more than 2, then you need to take away the tool box to make room for the rest of the HDDs).
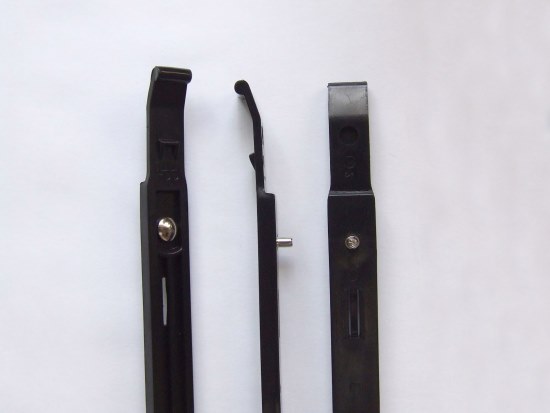
The HDD runners that you need to mount on your HDD.
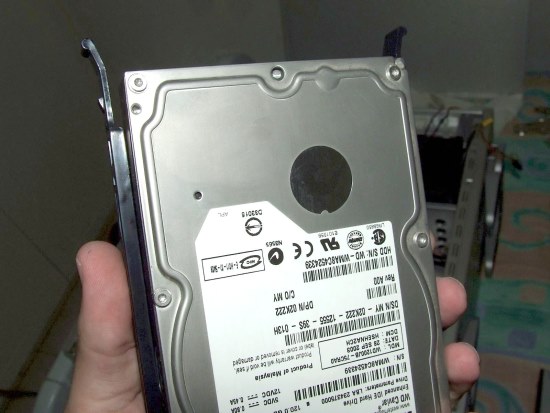
This is how the HDDs should look once installed with the retainer clips.
