Cooler installation (Corsair 275R)
Cougar Phontum Gaming Headset Review - Time for the tunes
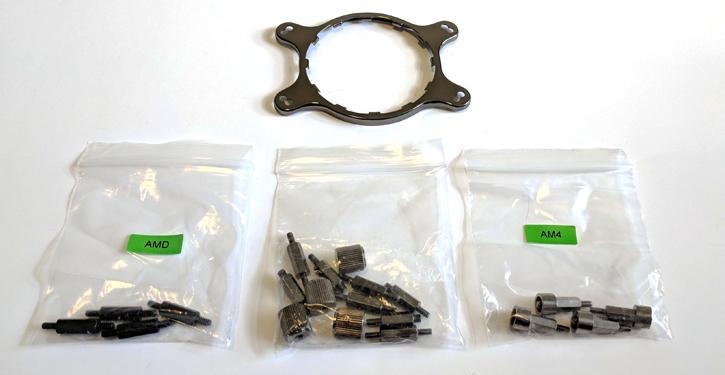
Now we can assemble the cooler, and then install it into the case. As before mentioned, the cooler comes pre-fitted with Intel's universal mount for LGA 115X, meaning all sockets right back to LGA 1156 (i.e. Intel 1st Generation 'Core') are supported. We must first replace this with the Univeral AMD bracket, which actually supports both AM4 and all legacy AMD sockets back to AM2 and FM1. This is an easy task, and a quick twist allows the bracket to come free, and the AMD one is installed instead.
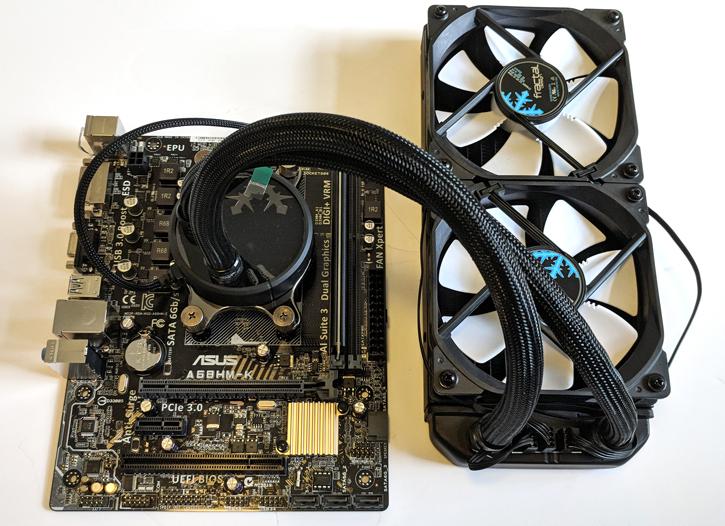
The next job is installing the fans, which are mounted with 8 entirely standard long thread screws. Today, as we are installing this cooler as a top exhaust, with fans mounted to the bottom of the unit. I mentioned that it is fairly easy to route the fan cables in and around themselves to keep cable management even tidier, and - for the most part - the cables are long enough to allow whilst still being sufficient to reach the integrated fan hub. Now, whilst there is no obligation to use the hub on the radiator itself, I don't see why you wouldn't unless you had a 3rd party unit like Corsair's Commander or NZXT's Grid. Even then, most motherboard vendors (E.g. MSI's 'Command Centre') have tuning utilities for all fans connected to SYS_FAN and CPU_FAN headers, and even AIO pump headers where relevant.
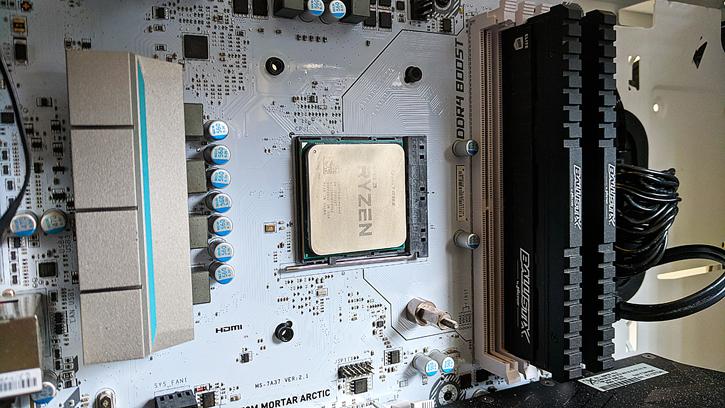
The cooler uses AMD's stock backplate, and four 'posts' are simply screwed into place, fat side flush against the board (for AM4). The pump head then simply pushes up against the CPU, and four large cross thread nuts can be hand tightened with ease, securing the cooler into place. This process was incredibly straightforward, and the flexibility of the hoses meant that holding the pump head into position whilst the screws were tightened was also an easy affair (not something that can be said of some other AIOs I have used in the past). Stiff hoses may provide some peace of mind as to their reliability, but there is a practical limit. This limit is me having to push down on the pump head with my body weight in order to keep it 'pinging' off. No issues with that here.
BTW we used two motherboards installs, one dummy for photography and then one MSI mortar for the final build.
Radiator installation is nothing out of the ordinary, but to an extent, the installation of these AIOs is much of a muchness across the board, with only a few units offering something different, and that is largely due to some additional functionality or expandability. Again, 8 small cross head screws secure the radiator to your chassis. Simple. I have actually used these same GP-12 PWM fans as case fans in previous builds, but never on a radiator. It will be interesting to see how they hold up, given their lower rated static pressure when directly compared to the fans supplied with Corsair's or NZXT's 240mm AIOs.
Now all of that is out of the way, we can move on and look at how the S24 performs at stock and overclocked speeds. As someone who is especially sensitive to noise, I am equally interested if this cooler can be as quiet as my current 120mm unit from Noctua. Certainly, AIOs have another source of noise, and that is the pump. I have not, however, used an AIO in the last 2/3 years where this is a problem, even with the pump at max RPM.
