Product Installation
Product Installation
Mounting the cooler is a relatively easy thing to do, though the motherboard needs to come out of the chassis unless you have a chassis with a mainboard cutout for CPU cooling.

Now you must first prepare the back-plate. We apply the back-plate which we line up and install at the back side of the motherboard. Just push it through there. The back-plate is a bit wobbly to install though as the retention pins do not pass through the motherboard holes. BTW it's a one size fits all, but do pay attention as to how you mount it.

We install four standoff screws to the back-plate. You can see the four holes surrounding the socket, the bracket is pushed onto there properly.

Clusterfrack: We had to reorientate the water block as the intended position with tubing to the top side would not fit. This means the size exceeds the LGA socket design spacing. Keep that in mind, as we expect the block will bump into heatsinks on many motherboards. Rotating the block 90, 180, 270 degrees then is your only alternative. Not a big deal, but it won't look as clean as intended.
Place the mounting bracket over the standoff screws and secure these with four thumbscrews as shown in the photo above.
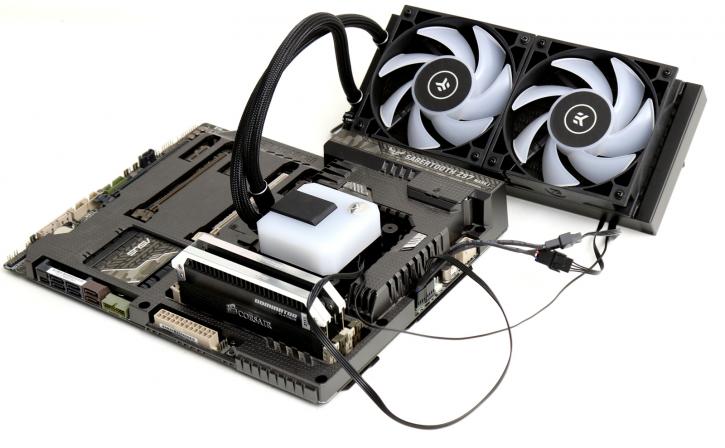
You need to connect the pump/fan RPM wires to a secondary or dedicated FAN header and fans to the CPU fan header. All this is 15 minutes of work, tops. We positioned the cooler and are ready for the first test run.
