Page 8
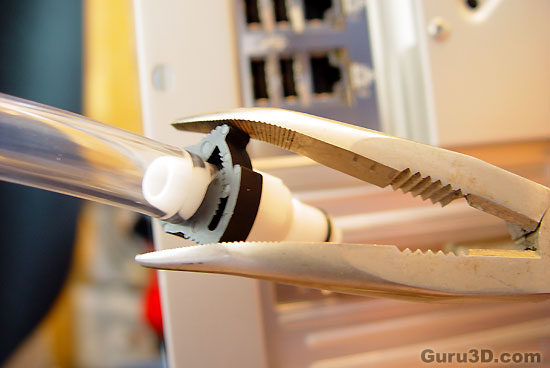
Before we can connect the last part of the tubing towards the Nautilus we have to do the last stage of assembly. We install the quick connects & clamps. Use a good amount of force here.

Now we push the tubing into the nautilus and we are ready to fill the system. Now before you enable the system we need to check for leaks without powering on the actual PC !
Danger Will Robinson DANGER !
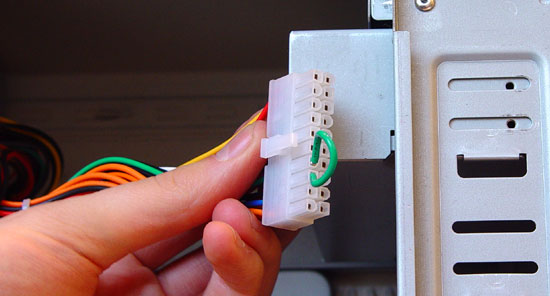
It's time to fill the kit with some fluid but, you do not want to turn on your entire PC just yet. Make sure you disconnected your ATX power plug and remaining 4-pin power plug from your mainboard. We are going to bypass the electronics circuit for everything except the Nautilus 500.
Now here's a trick I'm going to teach you, Guru style. Make sure that the only thing connected to the PSU is the water cooling pump/controller unit. Thus take the ATX power connector that normally mounts to your mainboard (see above picture) and bridge pin 13 and 14 (Black/Green) with a wire.
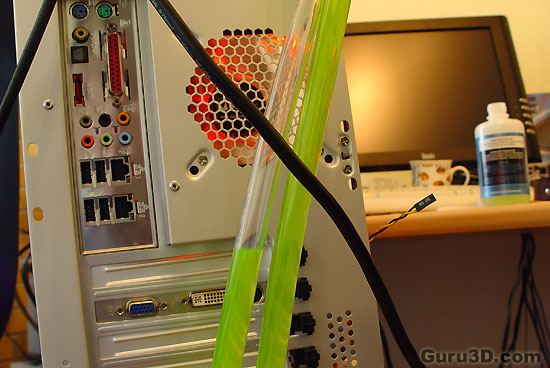
What happens is this, your PSU will now activate itself and your pump will start working. Shake the tubing, fill the reservoir with water and anti-algae fluid, etc. Do what you need to do to make sure there is no air in there and that the water is flowing, it should not take you more than a minute.
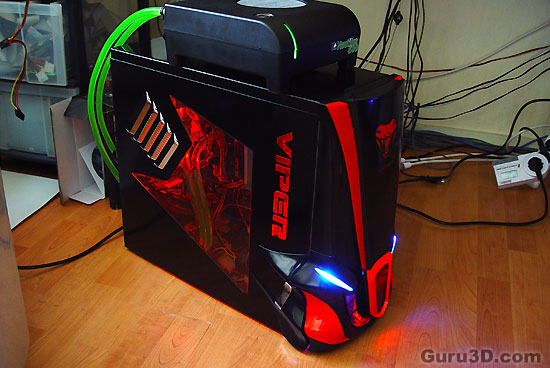
Full flow, and no leaks ... my Precious! Sweet momma, pretty huh ?
