Alpine 64 Installation & Testing
Installation
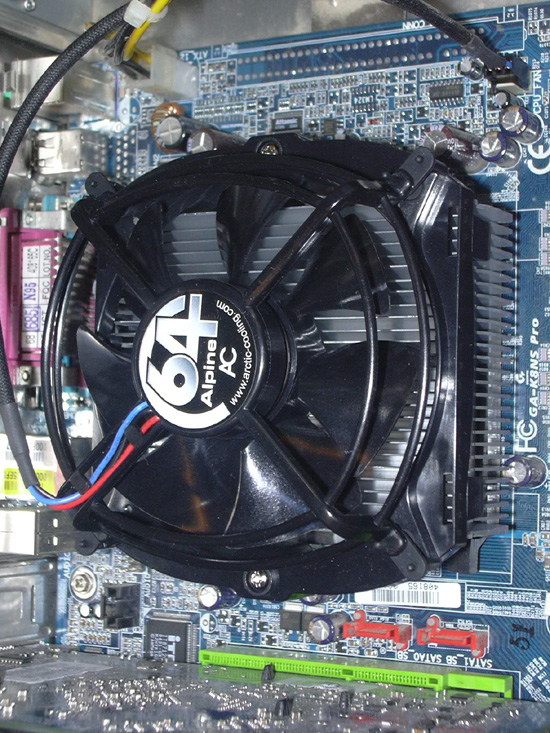
As previously mentioned, installation is very very simple. You do not need to replace the stock A64 bracket, you do not need to remove your motherboard to install the cooler, and you do not need to apply loads of pressure. In fact, I really like the way you can install the cooler.
I will assume you have already removed your previous heatsink & fan, have cleaned the surface of the CPU, and have your stock bracket in place.
- Take one of the clips, and place it up inside the gap on one side of the sink.
- Make sure it is rotated so that the clip first angles away from the heatsink, then back inwards, and finally downwards.
- Next grab a screw and using a Philips head screwdriver, make sure that clip is secure, but not completely done up.
- Next go to your CPU socket, angle the heatsink so that the clip you just installed fits securely over the lug on your socket retention bracket.
- Then bring the heatsink over so it's sitting almost flat on top of the CPU.
- You then need to apply the clip to the opposite side. Contrary to the instructions, what I did was to fit the clip over the lug first when it's not attached to the heatsink, then place the other end up into the gap on the heatsink, and finally screw it down. I found this was easier than having the clip in place already, as it needed excessive force to get it over the lug, which some people may have been uncomfortable with. This way, when you tighten the screw, it pushes the heatsink firmly down into place with it. Tighten both screws.
- Fit the 3 pin connector to your fan header and you're done.
Installation ... Complete!
The one thing I would however change about the way the heatsink is secured to the board, is that I would use a 3 pronged clip instead of a single prong. Although the heatsink is secure, it moves a little if you wiggle it, and I would feel more comfortable knowing that it was held in place better. That's my only slight complaint, although, another one might be the overhang of the sink, it is much bigger than the socket and hangs over the edge a fair way. That meaning if you have DIMM slots very close your socket, you may have issues.
Testing
Test system
A64 3000+ Newcastle
Gigabyte K8NS Pro
2x512MB Hynix PC3200
PNY 6600GT
Test notes
- Arctic Ceramique was applied to both heatsinks to make it a fair experiment. We are testing the effectiveness of the heatsinks, not the pastes also.
- Remember to keep in mind the temperature difference between the two sinks, rather than expecting yourself to attain these sort of temperatures. The room was cold and the test system was well cooled.
- Tests were conducted in a closed case.
- The Gigabyte board doesn't go over 220HTT, this CPU has a 10x multi, and it can do 2200MHz on stock vcore, so I decided to test at different vcores instead to see how it dealt with the extra heat, whilst remaining at 2000MHz.
- Idle temps were after booting and leaving the system at the desktop for half an hour.
- Load temps were after running Prime95's "in place large FFT's" test for half an hour.
Test results
- 1.5v
Stock cooler idle: 22c
Alpine 64 idle: 17cStock cooler load: 35c
Alpine 64 load: 31c
- 1.6v
Stock cooler idle: 23c
Alpine 64 idle: 21cStock cooler load: 44c
Alpine 64 load: 38c
- 1.7v
Stock cooler idle: 26c
Alpine 64 idle: 24cStock cooler load: 54c
Alpine 64 load: 46c
