Showcase
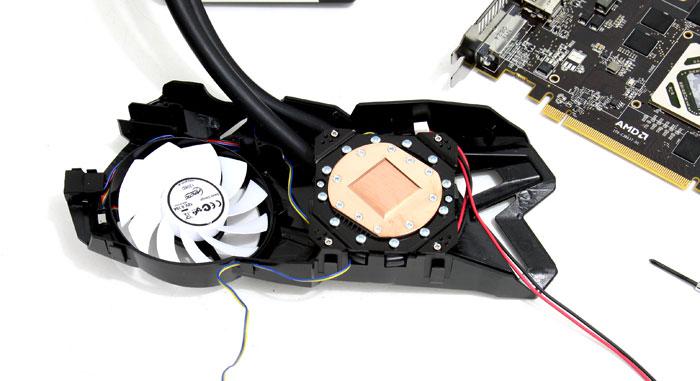
We now take the cooler casing and will need to mount the water block onto it with the help of four screws. Inside the plastic base we mounted three rubber washers that help prevent resonating noises.
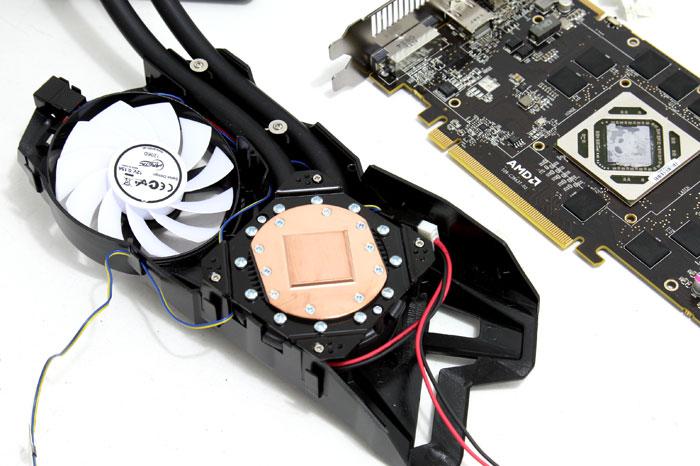
Now is also a good time to sort out your wiring and and tubing. pretty much one power connector goes to the PCB and powers the fan that cools the memory and VRM area. The cable leading from the liquid cooling block/pump will get an external power feed from a Molex connector. Once you've positioned the tubing you need to secure it with two wide screws.
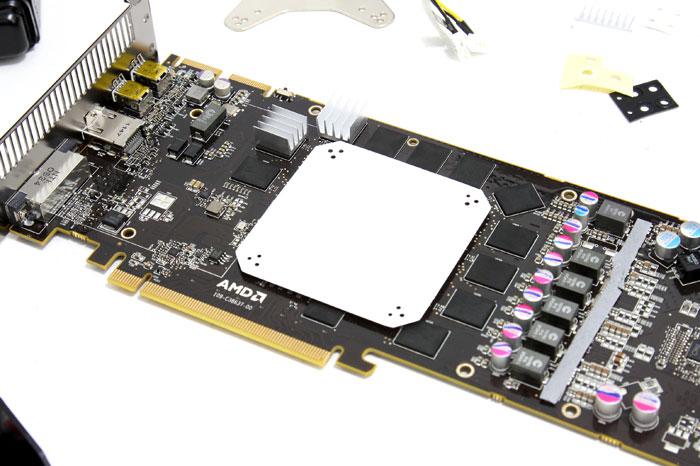
With the LCS unit prepped we need to do some work on the PCB. We place a temporary Mounting Mask on the GPU that helps us with visibility, what you see is the area that needs to stay clear for the cooling block. You now apply drops of adhesive on the memory locations and IC zones. Bear in mind that this adhesive is literally glue... so be careful and also be very aware that you are glueing heatsinks onto your ICs, you can NOT remove them afterwards.
We decided to skip glueing the heatsinks onto the aforementioned ICs, we need to revert this card back to reference. Mind you, you WILL NEED to use the heatsinks at least for the VRM area as these puppies need cooling. Alternatively you could skip the memory cooling, your call.
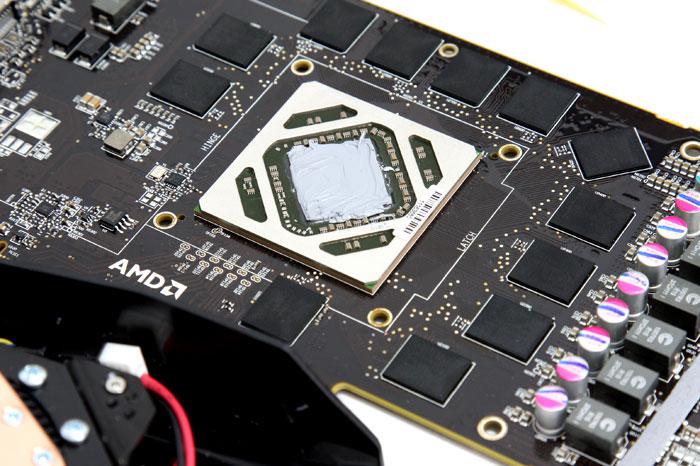
Once we've cleaned the GPU we apply a decent amount of (included) MX-4 thermal paste. Honestly don't be shy here... a nice drop will do and then spread it out. Once you've placed the cooling block on top of it, twist it to the right and left a little so that you know the copper base has good contact with the die area.
