Cooler installation
Cougar Phontum Gaming Headset Review - Time for the tunes
Cooler installation is perhaps the factor which can elevate an air cooler from 'good' to 'truly great.' This isn't so much of a big deal on smaller heatsinks like the Leto Pro, but for larger units that have serious heft (i.e. anything that uses a dual tower design), making the said unit easy to lock into place is going to be brownie points for the manufacturer. That said, all coolers need to be easy to install, and that is what we're going to look at now.
Right off the bat, Raijintek provides mounting hardware for a huge variety of platforms up to AMD's latest AM4 socket (please note that due to its special requirements, socket TR4 for AMD Threadripper is not compatible). Raijintek has also included Intel's old and new HEDT platforms, X99 and X299 on the LGA1366, 201X, and LGA2066 sockets.
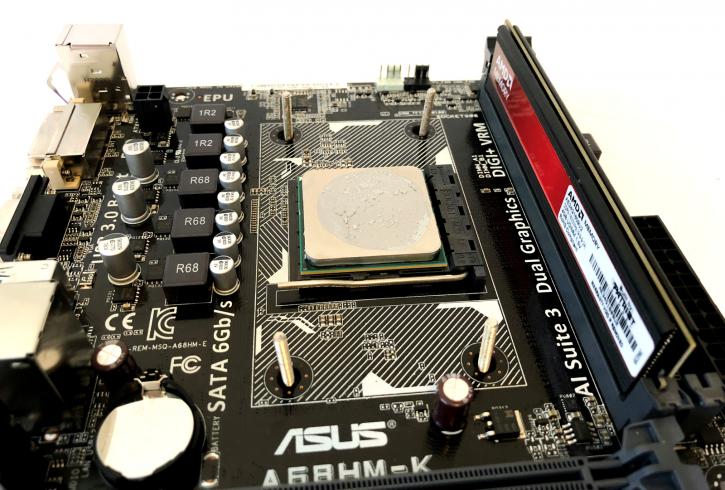
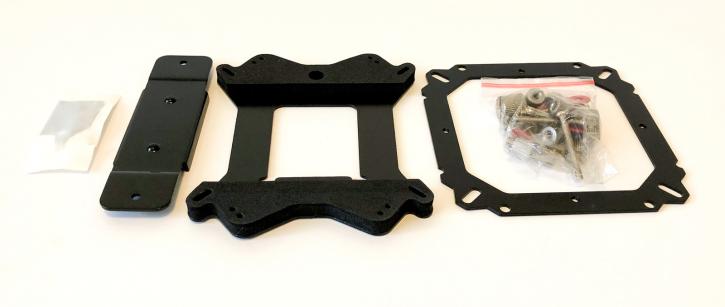
I shall be mounting this cooler to a modern B350 board on the AM4 socket (specifically MSI's B350M Mortar Arctic, and this will be relevant later), so for those using Intel I am sure - out there, there will be sites that have used the Leto on your chosen socket. Right away, I like how Rajintek have made an 'all-in-one' backplate for both Intel mainstream and AMD. This is great, especially for a budget cooler that will likely be of interest to first time builders, as it removes a lot of guesswork.
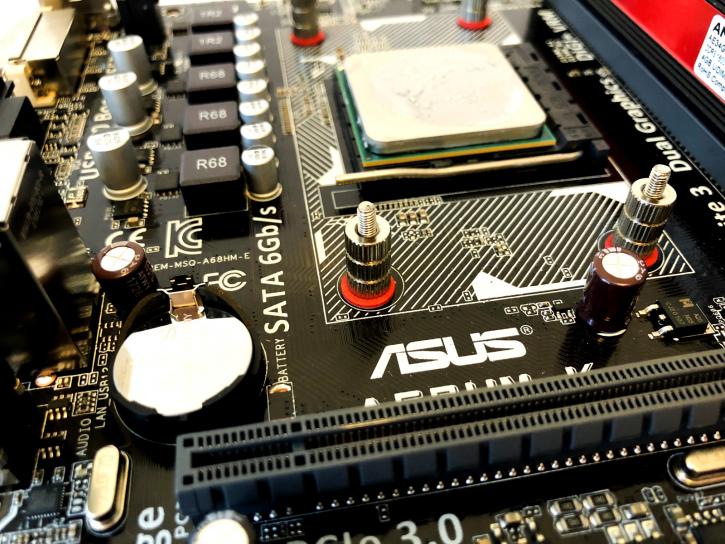
So, how is installation? Well, in two words... initially difficult. Now, the reason I precede this whole segment with a slight caveat is that no other review who has installed this cooler on either Intel LGA1151 or AMD AM4 has reported on the kinds of issues I had. For the record, this really only applies to the very beginning of the install. After that, it was a relative breeze. So what happened? Well, Raijintek provides a padded backplate to use with all sockets. There are holes in various positions for said sockets. Sadly, this turned out to be a bit of nightmare. Using the holes indicated by Raijintek for AM4 meant that the long screws poking through the backplate did come through, but at odd angles, meaning installation would have been impossible. I, therefore, had to two use two AM4 holes and two AM(X) ones in order to get the four posts to come through even remotely straight. Once this was done, however, the rest was plain.
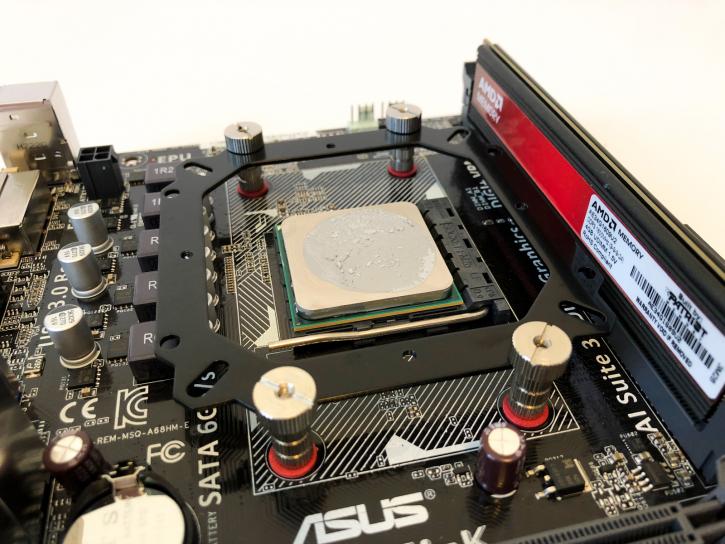
Next up, an all socket bracket is placed atop the newly installed posts and is in turn secured by four more nuts. Two brass colored standoffs (similar to what you might install for a motherboard) are then screwed by hand into the sides of the top bar, opposite one another. A crossbar is then placed onto the top of the cooler's cold plate, and the cooler can then be secured onto the bracket using two small screws.
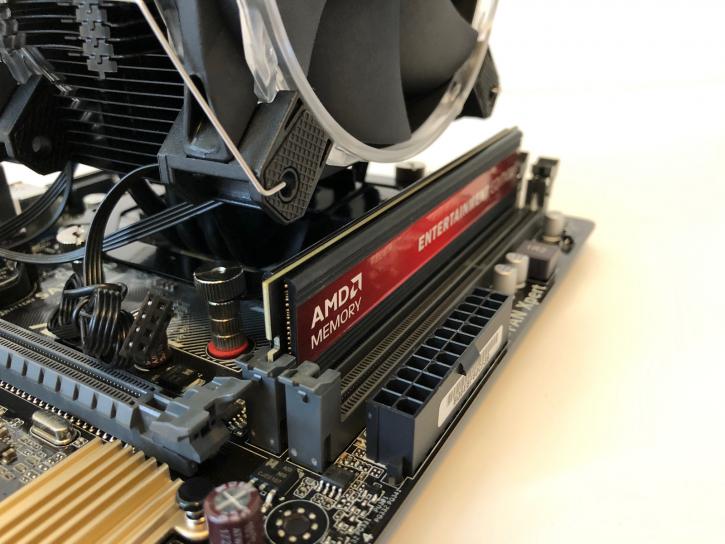
That may sound like a lot of stages, and it might well be, but it was also so easy that I didn't really need the manual aside from once to double check the orientation of the 'top plate'. I appreciate that I have built a few PCs before, however, so I did use the manual just for clarity's sake. It was well illustrated, clearly written, and easy to follow. I should mention that Raijintek instructs that the fans be off for the install procedure, otherwise good luck getting at the screws to mount the unit. This was my second gripe, really, as space inside even my fairly spacious 275R was a challenge to say the very least. This was mainly due to pure awkward positioning, case depth, my big hands, and the stiffness of the new clips. To be fair to Raijintek, It's no different to mounting the fans onto my NH-U12S, and I think this is more something that needs to change with fan mounting in general than is necessarily the fault of Raijintek .
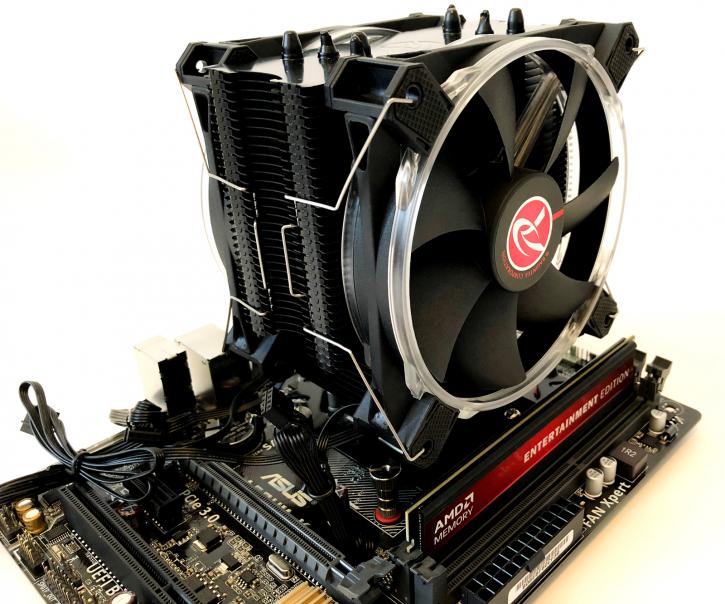
Fans aside, mounting this cooler was fairly average, but I thoroughly recommend mounting it outside your case and then installing the mainboard. My reservation here is that other reviewers clearly had no issue, so potentially I had received a slightly 'off' machined unit, or there is something about my motherboard that threw the install off. Certainly, all four AM4 holes were never going to line up correctly, that was for sure. With all that preamble out of the way, shall we move onto the testing?