Overclocking The Pentium-K G3258 Processor
Overclocking The Pentium-K G3258 Processor
If you are planning to do some overclocking with a Haswell based processor (which the Pentium K really is), you are so much better off with a K model processor. Hence we LOVE the fact that intel released the Anniversary edition.
Why K versions you ask? Well, the default non-K processors will be much harder to overclock. With Nehalem/Clarkdale (last generation Core i3/i5/i7) you pretty much take your base clock of 133 MHz and apply say a default multiplier of 25, that would be your 3.33 GHz processor. That base clock was capable of going so much higher, 150, 186 and when tweaked right, even over 200 MHz. So if you were able to apply a fictive 175 MHz on your base clock, you could multiply it with the limited 25 multiplier. That would get you 4375 MHz. The new technology however has an embedded GPU / video processor merged into the very same processor die running over the same bus sharing the same L3 cache memory, things get increasingly complicated in matters of tweaking. But please do get a 30 bucks more K version and in the BIOS you'll have much better tweaking options. With a proper motherboard you can now set a multiplier per core.
The (generic) procedure is as follows:
- Leave baseclock for what it is
- If needed, increase the TDP limit of your processor to 200~250 Watts
- With a Pentium-K G3258 model change Turbo multiplier to 42 initially and gradually work your way upwards.
- Increase CPU voltage, though setting AUTO might work fine, we think 1.2~1.250 V on this motherboard is a sweet spot if you stay under 4200 MHz. 4500 Mhz requries 1.4V - above 4700 MHz you are reaching 1.50 Volts
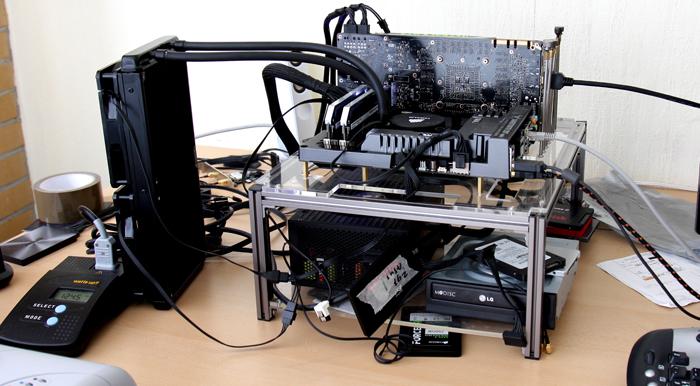
- Make sure your processor is properly cooled with enthusiast grade heatpipe cooling or liquid cooling
- Save and Exit BIOS / UEFI
We use a Corsair H110 liquid cooling kit. Great cooling for a good price, whilst silent. Set the BIOS to normal fan RPM and you'll have ying-yang cooling.
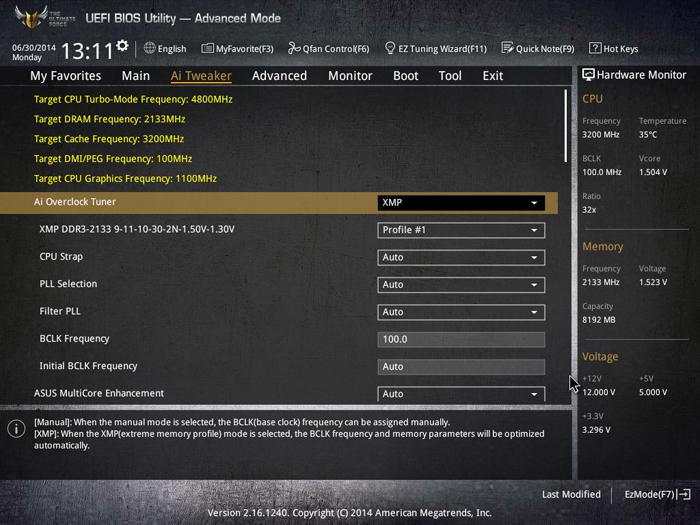
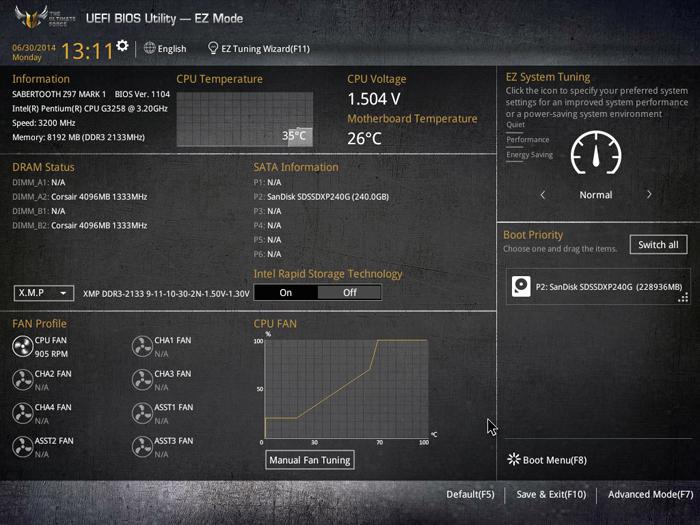
Overclocking is really simple with the ASUS motherboards. Most of the settings can remain at "auto". We have 2133 MHz DDR3 memory which we can auto configure by the XMP profile like shown above. This will apply the vanilla timings you need with the DDR3 voltages pre-applied. We can use XMP as we overclock on the multiplier, and not on the BCLK baseclock.
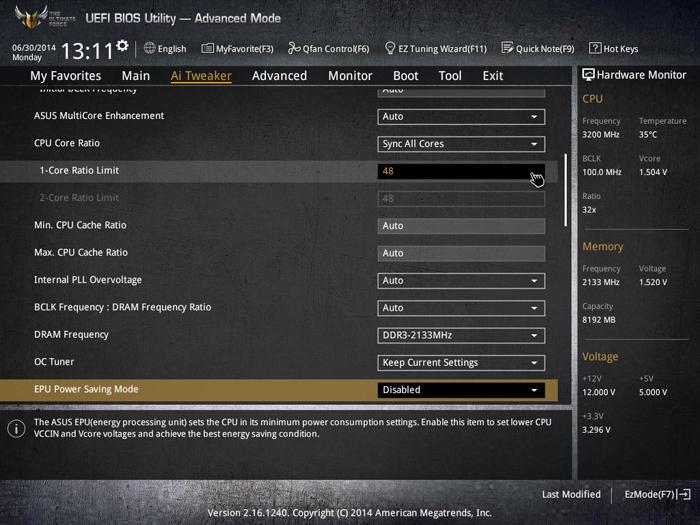
Once we activated the XMP profile we had to find a sweet-spot in stability. We ended up at 4800 MHz. We merely change the core ratio limit to 48.
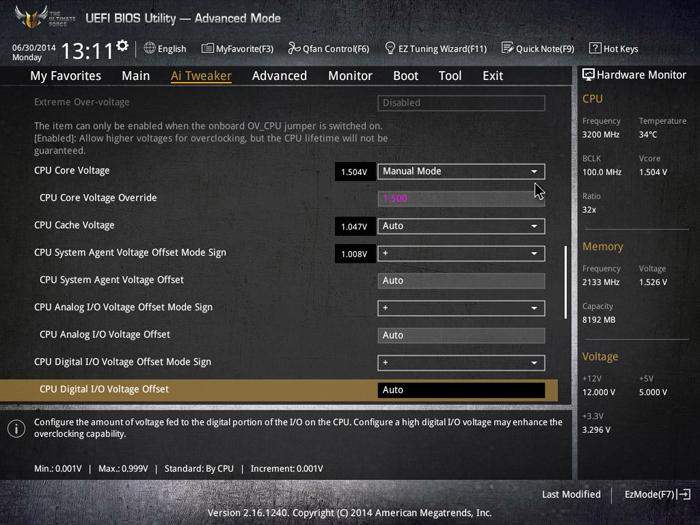
That however does require a lot of volts. But with two cores and proper cooling, this will be okay at 1.50 Volts.
That's all there is to it. Basically in the BIOS we flick the multiplier towards 48, activated the XMP memory profile (2133 MHz) and we were up and running, but not stable. We actually needed to pump 1.50 Volts into the CPU to get it stable enough at 4800 MHz. Whatever we tried, we have not been able to pass 4800 MHz as 4900 MHz even at 1.55 Volts crashes. Now the 4800 MHz is at this stage 100% stable with high but acceptable temperatures.
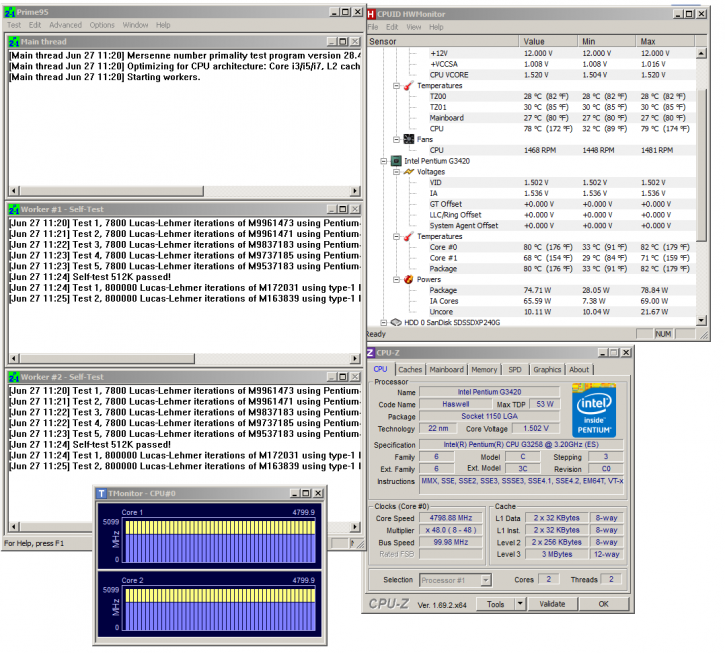
You can see that at 4800 MHz we have stable stress temperatures that remain acceptable. Many of you will likely end up with a maximum OC of 4600 maybe 4700 MHz max we think. That is if you are on a LCS kit or heat based cooler.
Overclocking with increased voltages will increase your power consumption though, always keep that in mind. You can easily add another 75 Watts on top of your overall power consumption when the CPU is under heavy load with higher voltage.
