Accelero X1 Introduction, Specs & Packaging
The Accelero X1
Introduction
My first [real] video card was a NVIDIA GeForce 2 Ti. Why am I opening with such a comment, you ask. Well, see the thing about video cards back then, was that they either required a tiny heatsink/fan combo, a simple heatsink, or no cooling at all. This particular card, a Creative Labs version, had a 40mm fan encased in a tiny alu heatisnk. This was more than enough to adequately cool the card. If you think that today, a 40mm heatsink/fan combo is likely what you have on your motherboard chipset, you can see how far things have developed. Graphics cards these days consume a huge amount of power and produce an abundance of heat. Some of the cooling solutions available today are very large, and this new Accelero from Arctic Cooling is no different.
I'm not sure why, since the Arctic Silencer series were, and still are, a huge success, but AC have decided to introduce a new GPU cooler, based on a completely different design. The market for 3rd party GPU coolers today is very large, and the market is largely controlled by AC themselves and Zalman. This product needs to make an impact upon this market or else it'll get brushed aside by the competition, including it's brother the Arctic Silencer, which has pretty much already achieved 'legendary' status among enthusiasts.
Let's see how the Accelero X1 does. Read on. =)
Specs
- Compatible with both the Nvidia 6800 and Nvidia 7800 series cards (The Accelero X2 will fit X1800/X1900 cards)
- Six year warranty
- Extremely quiet
- Unique cooling performance
- 6 heat pipes
- Voltage converter cooling
- Long service life
- Easy installation
- Patented vibration absorption
- 60mm fan
- 500-2000 RPM fan speed
- Fluid dynamic bearing
Thermal resistance:
Accelero X1: 0.39 C/W
7800GTX standard cooler: 0.95 C/W
(Lower is better)
Noise level:
Accelero X1: 0.4 sone
7800GTX standard cooler: 2.0 sone
(Lower is better)
Packaging
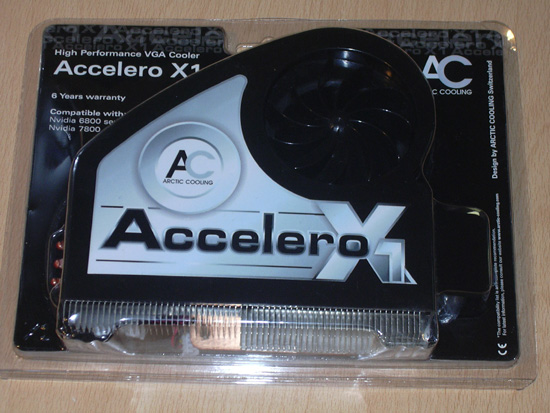
The front side of the package, clearly showing the product on offer as well as the cards it is compatible with. This ensures you don't purchase the wrong model.
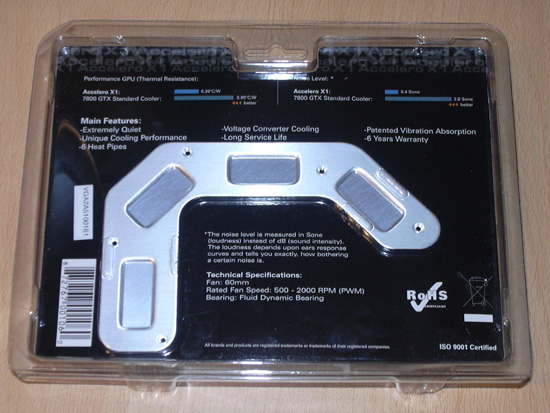
The back side shows the passive memory heatsinkk and specs of the product.
The cooler comes in a blister pack. If this product was on a store shelf, you'd be able to see the product itself rather than relying on sketches or diagrams. The blister pack simply has small clips down the side that easy come apart to open the pack. It's the same style as the packaging used by G.Skill RAM. No need to tear apart the pack using a pair of scissors or a knife, then.
The plastic is moulded around the cooler and passive memory heatsink to ensure it doesn't move around whilst in transit. The various accessories included are tucked around and behind the cooler. The backing card gives you the info I have listed above in the specs. Again, this packaging uses a silver and black theme, which is subtle and looks good, but it's not very eye catching.
Inside the pack, apart from the cooler, you will find some comprehensive instructions, the passive memory cooler, thermal pads and a bag containing 6mm & 8mm screws, as well as plastic washers.
The cooler itself has a plastic covering, which you will need to pull off before installing the cooler onto the card. It is present to protect the layer of thermal paste which is already applied. Again, this is AC's own MX-1 compound, same as used on the Alpine 64 a few pages ago.
The instructions are again in German and English, and are well written. Although installing this cooler isn't too challenging, some of you may be a bit wary of dismantling an expensive graphics card, so to have comprehensive instructions to guide you is a confidence boost for sure. It even tells you how to remove the stock cooler from your card, which is an excellent inclusion.
The passive memory cooler is for the RAM on the back of your card, should you have some present. You must use the thermal pads in between the RAM and the passive heatsink/GPU cooler.
Although the screws come in two different sizes, you can easily tell them apart (they have different head designs as well) and you get told which size to use for which part of the installation. The plastic washers are simply for when you install the four screws around the core.
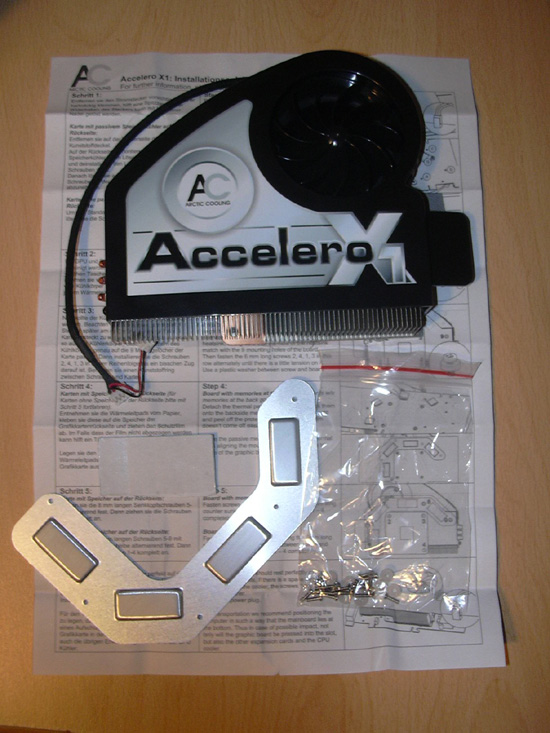
The package as a whole. The main part of the cooler, the memory heatsink, screws/washers, thermal pads and instructions.
